PEIMT Berlin is a management and technology university that needed a modern, professional website — one where the marketing team could update any content on the site without developer involvement. No hardcoded text, no code deployments for a headline change, no dependency on a developer to add a new course.
I built the entire project solo — React frontend, Laravel backend, Filament admin panel, and the REST API connecting them. The result is a fully content-managed university website where every section, course, page, and media asset is controlled from a clean admin dashboard.
Client | PEIMT Berlin |
My Role | Full-Stack Developer (solo) |
Frontend | React.js |
Backend | Laravel + Filament |
Type | Freelance Project |
Live Site(demo) |
University websites have a specific content management challenge: they're large, structured, and change frequently. New courses get added, admission deadlines update, faculty profiles change, hero banners rotate with new campaigns — and none of this should require a developer.
The client's requirements were clear:
A professional, modern frontend that reflects the quality of a Berlin management university
A fully dynamic CMS — every piece of visible content should be editable from an admin panel
Course and program management — add, edit, reorder programs without touching code
Admissions and inquiry forms — submissions stored and manageable from the admin
SEO control — meta titles, descriptions, and OG tags manageable per page
Media management — logo, images, and section assets uploadable and swappable by the admin
The architecture decision that shaped everything: the frontend and backend are fully decoupled. React fetches content from a Laravel API. The Filament admin writes to the same database. Content changes in Filament appear on the live site immediately — no rebuild, no redeployment.
Laravel has several CMS options — Nova, Voyager, custom-built panels. I chose Filament for this project for a few reasons:
Rapid resource generation — Filament's resource system lets you scaffold a full CRUD interface for any model in minutes, with sensible defaults that are easy to customize
Rich field types out of the box — file uploads, rich text, repeaters, key-value fields, image previews — all the field types a content editor needs without custom code
Clean, modern UI — Filament's interface is polished enough to hand directly to a non-technical client without embarrassment
Relationship management — managing courses with their modules, instructors, and metadata through Filament's relation managers is far cleaner than building it custom
The tradeoff: Filament is admin-only. It doesn't render the frontend — that's React's job. Every admin action writes to the database; React reads from the API. This separation keeps both sides clean and independently deployable.
Every visible piece of content on the site is controllable from Filament. Here's the full breakdown:
The homepage is divided into distinct sections — hero banner, stats bar, about snippet, featured programs, testimonials, call-to-action. Each section is its own Filament resource with its own fields:
php
// app/Filament/Resources/HeroSectionResource.php
class HeroSectionResource extends Resource
{
    protected static ?string $model = HeroSection::class;

    public static function form(Form $form): Form
    {
        return $form->schema([
            TextInput::make('heading')->required()->maxLength(120),
            TextInput::make('subheading')->maxLength(200),
            RichEditor::make('description')->columnSpanFull(),
            FileUpload::make('background_image')
                ->image()
                ->disk('public')
                ->directory('hero')
                ->imageResizeMode('cover')
                ->imageCropAspectRatio('16:9'),
            TextInput::make('cta_label')->label('Button Text'),
            TextInput::make('cta_url')->label('Button URL'),
            Toggle::make('is_active')->default(true),
        ]);
    }
}
The is_active toggle lets the admin switch between hero variants — useful for seasonal campaigns — without deleting the inactive one.
Each program has a full content profile — title, description, duration, mode (online/on-campus/hybrid), curriculum highlights, career outcomes, and an admission requirements section. Programs can be reordered via drag-and-drop in Filament's table view.
php
// Course model relationships
class Course extends Model
{
    public function modules(): HasMany
    {
        return $this->hasMany(CourseModule::class)->orderBy('order');
    }

    public function faqs(): HasMany
    {
        return $this->hasMany(CourseFaq::class);
    }
}
Filament's RelationManagers handle the nested module and FAQ editing inline — the admin edits a course and its curriculum modules in the same form without navigating away.
Rather than hardcoding the navigation, the menu structure is stored in the database and managed via a Filament resource. The admin can add, remove, reorder, and nest navigation items — including external links and anchor links to page sections.
Site-wide assets — logo, favicon, footer logo, social preview image — are stored as named key-value settings in a site_settings table. Filament's custom settings page handles these:
php
// app/Filament/Pages/SiteSettings.php
class SiteSettings extends Page
{
    protected static ?string $navigationIcon = 'heroicon-o-cog';
    protected static string $view = 'filament.pages.site-settings';

    public ?array $data = [];

    public function form(Form $form): Form
    {
        return $form->schema([
            Section::make('Branding')->schema([
                FileUpload::make('logo')->image()->disk('public')->directory('branding'),
                FileUpload::make('favicon')->image()->disk('public')->directory('branding'),
                TextInput::make('site_name'),
                TextInput::make('tagline'),
            ]),
            Section::make('Contact')->schema([
                TextInput::make('email'),
                TextInput::make('phone'),
                TextInput::make('address')->columnSpanFull(),
            ]),
            Section::make('Social Media')->schema([
                TextInput::make('linkedin_url'),
                TextInput::make('twitter_url'),
                TextInput::make('instagram_url'),
            ]),
        ]);
    }
}
One settings page, every global site value in one place.
The React frontend fetches all content from the Laravel API on load. Every section of the homepage, the full course list, navigation items, and site settings are API-driven — nothing is hardcoded in the React codebase.
The API is structured around page-level endpoints to minimize round trips. Instead of React making 8 separate requests to assemble the homepage, one endpoint returns everything the homepage needs:
php
// GET /api/pages/home
public function home(): JsonResponse
{
    return response()->json([
        'hero'        => HeroSection::active()->first(),
        'stats'       => StatItem::ordered()->get(),
        'about'       => AboutSection::first(),
        'programs'    => Course::featured()->with('modules')->take(6)->get(),
        'testimonials'=> Testimonial::active()->ordered()->get(),
        'cta'         => CtaSection::first(),
        'settings'    => SiteSetting::keyValueMap(),
    ]);
}
SiteSetting::keyValueMap() is a custom scope that returns the site_settings table as a flat key-value object — { logo: "...", site_name: "...", email: "..." } — so React can access any setting with settings.logo without nested traversal.
On the React side, a custom hook handles the fetch with loading and error states:
javascript
// hooks/usePageContent.js
export function usePageContent(page) {
    const [content, setContent] = useState(null);
    const [loading, setLoading]   = useState(true);

    useEffect(() => {
        fetch(`${process.env.REACT_APP_API_URL}/api/pages/${page}`)
            .then(res => res.json())
            .then(data => {
                setContent(data);
                setLoading(false);
            });
    }, [page]);

    return { content, loading };
}

// Usage in HomePage.jsx
const { content, loading } = usePageContent('home');
if (loading) return <PageSkeleton />;
Skeleton loaders during the API fetch keep the UX smooth — the page structure appears immediately while content loads in.
A university website lives and dies by organic search — prospective students search for programs, not URLs. Every page needed custom meta titles, descriptions, and Open Graph tags controllable from the admin.
I added an seo relationship to every major model (pages, courses) via a polymorphic seo_meta table:
php
// database/migrations/create_seo_meta_table.php
Schema::create('seo_meta', function (Blueprint $table) {
    $table->id();
    $table->morphs('metable'); // polymorphic — works for pages, courses, anything
    $table->string('meta_title')->nullable();
    $table->text('meta_description')->nullable();
    $table->string('og_title')->nullable();
    $table->text('og_description')->nullable();
    $table->string('og_image')->nullable();
    $table->string('canonical_url')->nullable();
    $table->timestamps();
});
In each Filament resource, an SEO section is appended to the form:
php
Section::make('SEO')->schema([
    TextInput::make('seo.meta_title')
        ->label('Meta Title')
        ->helperText('Recommended: 50–60 characters')
        ->maxLength(60),
    Textarea::make('seo.meta_description')
        ->label('Meta Description')
        ->helperText('Recommended: 150–160 characters')
        ->maxLength(160),
    FileUpload::make('seo.og_image')->label('OG Image')->image(),
])->collapsible(),
The API includes the SEO data in every page/course response. React's <Helmet> component injects these into the document head:
jsx
// In CoursePage.jsx
<Helmet>
    <title>{course.seo?.meta_title || course.title}</title>
    <meta name="description" content={course.seo?.meta_description} />
    <meta property="og:title" content={course.seo?.og_title || course.title} />
    <meta property="og:image" content={course.seo?.og_image} />
</Helmet>
Fallbacks (|| course.title) ensure the page never has empty meta tags even if the admin hasn't filled in the SEO fields yet.
The site has two forms — a general inquiry form and a program-specific admissions inquiry. Both store submissions in the database (visible in Filament) and send email notifications to the admissions team.
php
// app/Http/Controllers/InquiryController.php
public function store(Request $request): JsonResponse
{
    $data = $request->validate([
        'name'       => 'required|string|max:100',
        'email'      => 'required|email',
        'phone'      => 'nullable|string|max:20',
        'course_id'  => 'nullable|exists:courses,id',
        'message'    => 'required|string|max:1000',
    ]);

    $inquiry = Inquiry::create($data);

    // Notify admissions team
    Mail::to(config('mail.admissions_email'))
        ->send(new NewInquiryNotification($inquiry));

    return response()->json([
        'success' => true,
        'message' => 'Thank you! We will get back to you within 24 hours.'
    ]);
}
In Filament, inquiries appear in a read-only table with filters by course, date, and status (new/contacted/closed). The admissions team can mark inquiries as handled and add internal notes — a lightweight CRM built directly into the admin panel.
All images uploaded through Filament are stored on the server's public disk with organized directory structures. For the university context — hero images, course thumbnails, faculty photos, gallery images — I standardized upload handling with automatic image optimization:
php
FileUpload::make('thumbnail')
    ->image()
    ->disk('public')
    ->directory('courses/thumbnails')
    ->maxSize(2048) // 2MB limit
    ->imageResizeTargetWidth(800)
    ->imageResizeTargetHeight(600)
    ->imageResizeMode('cover')
Filament's built-in image resize on upload keeps file sizes manageable — a non-technical admin uploading a 6MB DSLR photo won't accidentally serve it at full resolution to every site visitor.
Decouple the CMS from the frontend completely. Filament writes to the database; React reads from the API. This means the admin panel and the frontend are independently deployable, independently cacheable, and independently scalable. A content update never requires a frontend build.
Design page-level API endpoints, not resource-level ones. A homepage that requires 8 API calls to assemble is slow and fragile. One endpoint that returns everything the page needs is faster and simpler to maintain.
Make SEO a first-class citizen, not an afterthought. A polymorphic seo_meta table that attaches to any model means every content type gets SEO fields automatically — pages, courses, blog posts — without duplicating columns everywhere.
Filament custom settings pages are underused. Most people use Filament for CRUD resources, but the custom settings page pattern is ideal for global site config — logo, contact details, social links — all in one place, with full type safety and validation.
Skeleton loaders make API-driven sites feel fast. In a decoupled architecture, the initial content fetch is always async. Skeleton screens that match the page layout prevent the jarring blank-then-content flash that makes API-driven sites feel slow.
Want to see how a specific section was built? Reach out via the contact page — happy to walk through the architecture in detail.
--- ### Case Study: Building TestMe — An Online Exam Management Platform for Schools - **URL**: https://sudhirrajai.com/case-studies/building-testme-an-online-exam-management-platform-for-schools - **Client**: N/A - **Year**: 2026 - **Summary**: A technical case study on building TestMe — a full-featured school exam management platform with 9 question types, real-time timer sync, cheat prevention, and a Flutter-facing API. Built with Laravel + Vue.js + Inertia.js. #### Content BreakdownTestMe is an online exam management platform built for schools — designed to let teachers create and schedule exams, students attempt them on a Flutter mobile app, and administrators manage everything from a centralized dashboard.
I was brought in as the backend and admin panel developer on this project. My scope covered the entire Laravel backend, the Vue.js + Inertia.js admin panel, and the REST API consumed by the Flutter mobile app. The Flutter frontend was handled by a separate developer.
My Role | Backend Developer + Admin Panel (Laravel, Vue.js, Inertia.js) |
Frontend (mobile) | Flutter (separate developer) |
Stack | Laravel, Vue.js, Inertia.js, MySQL |
Type | Freelance Project |
Schools managing exams manually — paper-based or through disconnected tools — face a common set of problems: question papers get leaked, grading takes days, results aren't actionable, and there's no visibility into how students are performing at a granular level.
The client needed a platform that could:
Let teachers build a structured question bank with multiple question formats
Schedule exams with time-limited sessions that work reliably across devices
Auto-grade most question types and generate instant results
Give administrators role-based control over who can do what
Serve all exam data to a Flutter mobile app via a clean REST API
Make it difficult for students to cheat during an active exam
Each of these sounds straightforward in isolation. Together, they create a system with a lot of moving parts that need to be designed carefully from the start.
The most architecturally interesting requirement was the question bank. Schools don't just use multiple-choice questions — they use a wide variety of formats depending on subject and grade level. The client needed the platform to support all of these:
Type | Description | Grading |
|---|---|---|
MCQ | Standard multiple-choice, one correct option | Auto |
True / False | Binary choice | Auto |
Fill in the Blank | Text input matched against stored answer | Auto |
Match the Following | Column-row matrix, metadata-driven | Auto |
Match the Phrase | Keyword-based phrase matching | Auto |
Case Study | Parent question with multiple MCQ sub-questions | Auto (per sub-question) |
Arrange in Order | Options reordered to match correct sequence | Auto |
Correct the Underlined Word | Identify and replace a highlighted incorrect word | Auto |
Find the Odd One Out | MCQ variant where the correct answer is the odd item | Auto |
Nine types. Each with different data structures, different rendering requirements on the Flutter side, and different grading logic. The database schema and API contract had to accommodate all of them without becoming a mess of nullable columns or type-specific tables.
The approach I settled on was a polymorphic question structure with a shared questions table and type-specific metadata stored as JSON:
php
// questions table
Schema::create('questions', function (Blueprint $table) {
    $table->id();
    $table->foreignId('question_bank_id')->constrained()->cascadeOnDelete();
    $table->string('type'); // mcq, true_false, fill_blank, match_following, etc.
    $table->text('content'); // the question text / stem
    $table->json('options')->nullable(); // type-specific structure
    $table->json('correct_answer'); // type-specific answer format
    $table->json('metadata')->nullable(); // extra config per type
    $table->integer('marks')->default(1);
    $table->enum('difficulty', ['easy', 'medium', 'hard'])->default('medium');
    $table->timestamps();
});
The options and correct_answer columns are JSON — their internal structure varies by question type, but the column is always present. This means one table, one model, and one API shape for all nine types. The Flutter app checks the type field and renders accordingly.
For example, a Match the Following question looks like this in the database:
json
{
  "type": "match_following",
  "content": "Match the following terms with their definitions",
  "options": {
    "left": ["Photosynthesis", "Respiration", "Transpiration"],
    "right": ["Release of energy", "Loss of water", "Making food from sunlight"]
  },
  "correct_answer": {
    "Photosynthesis": "Making food from sunlight",
    "Respiration": "Release of energy",
    "Transpiration": "Loss of water"
  }
}
A Case Study question has a parent record with child MCQ sub-questions linked via a parent_question_id foreign key — the only type that required a self-referential relationship.
The auto-grading logic is handled by a QuestionGrader service class with a grade(Question $question, $studentAnswer): int method. It switches on $question->type and applies the correct comparison logic — exact string match for Fill in the Blank, set comparison for Match the Following, sequence comparison for Arrange in Order, and so on. One entry point, type-specific logic inside.
A timed exam on a mobile app has an inherent problem: client clocks can't be trusted. A student could manipulate their device clock, lose connection mid-exam, or switch devices. The timer has to be authoritative on the server.
The approach I used:
When a student starts an exam, the server records started_at as the current UTC timestamp in the exam_attempts table.
The Flutter app receives started_at and duration_minutes from the API.
The remaining time is always calculated as: (started_at + duration_minutes) - server_now, returned on every API call the app makes during the exam.
The Flutter app uses this server-derived remaining time to drive its local countdown display — not its own clock.
php
// In the exam attempt resource / API response
public function toArray($request): array
{
    $endsAt       = $this->started_at->addMinutes($this->exam->duration_minutes);
    $remainingSecs = max(0, now()->diffInSeconds($endsAt, false));

    return [
        'attempt_id'       => $this->id,
        'exam_id'          => $this->exam_id,
        'started_at'       => $this->started_at->toISOString(),
        'ends_at'          => $endsAt->toISOString(),
        'remaining_seconds'=> $remainingSecs,
        'is_expired'       => $remainingSecs <= 0,
    ];
}
If remaining_seconds hits 0, the API automatically rejects any further answer submissions for that attempt. The timer is enforced server-side, not just display-side.
Exam integrity on mobile has a different threat model than web. There are no browser tabs to switch — but students can press the home button, pull down the notification drawer, or switch to another app. Flutter detects this via AppLifecycleState. The moment the app goes to background, the exam session is immediately terminated on the client side, and the Flutter app fires two API calls simultaneously: one to report the exit event, and one to submit whatever answers the student had already attempted.
When a student exits the exam — intentionally or accidentally — the following happens:
php
// POST /api/exam/exit
public function exitExam(Request $request)
{
    $request->validate([
        'attempt_id'       => 'required|exists:exam_attempts,id',
        'reason'           => 'required|in:background_switch,manual_exit,timeout',
        'partial_answers'  => 'nullable|array',
    ]);

    $attempt = ExamAttempt::findOrFail($request->attempt_id);

    // Immediately lock the attempt — student cannot re-enter
    $attempt->update([
        'status'           => 'suspended',
        'suspended_at'     => now(),
        'suspension_reason'=> $request->reason,
    ]);

    // Store partial answers in a temp table — not the results table yet
    if (!empty($request->partial_answers)) {
        foreach ($request->partial_answers as $answer) {
            TempAttemptedAnswer::updateOrCreate(
                [
                    'attempt_id'  => $attempt->id,
                    'question_id' => $answer['question_id'],
                ],
                [
                    'answer'      => $answer['answer'],
                    'answered_at' => $answer['answered_at'],
                ]
            );
        }
    }

    return response()->json([
        'status'  => 'suspended',
        'message' => 'Your exam session has been suspended. Please submit a reinstatement request.',
    ]);
}
The partial answers go into a temp_attempted_answers table — a holding area separate from the main results table. This separation is intentional: we don't want incomplete, unverified answers polluting the results until the exam is properly concluded.
Once suspended, the student lands on a "Request Reinstatement" screen in the Flutter app. They must submit a written reason for why they left the exam:
php
// POST /api/exam/reinstatement-request
public function submitReinstatementRequest(Request $request)
{
    $request->validate([
        'attempt_id' => 'required|exists:exam_attempts,id',
        'reason'     => 'required|string|min:10|max:500',
    ]);

    $attempt = ExamAttempt::findOrFail($request->attempt_id);

    // Ensure this attempt is actually suspended
    abort_if($attempt->status !== 'suspended', 422, 'No suspended attempt found.');

    $attempt->reinstatementRequest()->create([
        'student_id'      => auth()->id(),
        'reason'          => $request->reason,
        'requested_at'    => now(),
        'status'          => 'pending',
    ]);

    return response()->json([
        'message' => 'Your request has been submitted. Please wait for admin approval.',
    ]);
}
Until the admin acts on this request, the student's account is in a restricted state — they can browse the dashboard, view past results, and access settings, but the "Appear for Exam" button is disabled for any active exam. This is enforced API-side too: any attempt to start or resume an exam while a reinstatement request is pending returns a 403.
In the admin panel, a dedicated "Reinstatement Requests" queue shows each suspended student, their reason, the timestamp of the exit event, and a log of their background switch history for that attempt. The admin can approve or reject:
php
// POST /api/admin/reinstatement/{request}/approve
public function approve(ReinstatementRequest $reinstatementRequest)
{
    $attempt = $reinstatementRequest->attempt;

    // Check the exam is still within its active window
    if (now()->gt($attempt->exam->end_time)) {
        return response()->json([
            'message' => 'Exam window has passed. Cannot reinstate.'
        ], 422);
    }

    $reinstatementRequest->update(['status' => 'approved', 'reviewed_at' => now()]);

    // Reactivate the attempt — student can re-enter
    $attempt->update(['status' => 'active']);

    // Notify student via API (Flutter polls or uses push notification)
    return response()->json(['message' => 'Student reinstated successfully.']);
}
If approved, the student gets a notification and the "Appear for Exam" button becomes active again. Their previously attempted answers are preserved in the temp table and pre-loaded when they re-enter the exam — they don't lose what they'd already answered.
Whether the student gets reinstated or not, any partial answers sitting in temp_attempted_answers need to eventually make it to the results table. A cron job runs every 5 minutes and processes temp answers for any exam whose end time has passed:
php
// app/Console/Commands/ProcessTempAttemptedAnswers.php
public function handle()
{
    // Find exams that have ended
    $expiredAttempts = ExamAttempt::where('status', 'suspended')
        ->whereHas('exam', fn($q) => $q->where('end_time', '<', now()))
        ->get();

    foreach ($expiredAttempts as $attempt) {
        $tempAnswers = TempAttemptedAnswer::where('attempt_id', $attempt->id)->get();

        if ($tempAnswers->isEmpty()) continue;

        DB::transaction(function () use ($attempt, $tempAnswers) {
            foreach ($tempAnswers as $temp) {
                // Move to permanent result table
                AttemptedAnswer::updateOrCreate(
                    [
                        'attempt_id'  => $attempt->id,
                        'question_id' => $temp->question_id,
                    ],
                    [
                        'answer'      => $temp->answer,
                        'answered_at' => $temp->answered_at,
                    ]
                );

                $temp->delete();
            }

            // Mark attempt as submitted so grading can run
            $attempt->update(['status' => 'submitted']);
        });
    }
}
php
// app/Console/Kernel.php
$schedule->command('exam:process-temp-answers')->everyFiveMinutes();
This means that even if a student exits mid-exam and never gets reinstated, whatever they answered isn't lost — it gets scored and counted in their result within 5–10 minutes of the exam closing.
Results don't appear the moment an exam is submitted. They're gated behind the exam's end_date — students can only see their results after the exam window has completely closed for all students. This prevents a student who finishes early from sharing answers with others who are still attempting.
php
// In the results API endpoint
public function showResult(ExamAttempt $attempt)
{
    // Block result access if exam end date hasn't passed yet
    if (now()->lt($attempt->exam->end_date)) {
        return response()->json([
            'available' => false,
            'message'   => 'Results will be available after ' . $attempt->exam->end_date->toFormattedDateString(),
        ]);
    }

    return response()->json([
        'available' => true,
        'result'    => new ExamResultResource($attempt->load('answers.question')),
    ]);
}
The Flutter app checks available and either shows a countdown to the result release date or renders the full result screen. This keeps the experience clean — students always know when results will be available, and they can't accidentally see them early.
Creating questions one-by-one through a form is tedious for teachers who already have existing question banks in spreadsheets. I built a bulk import feature that accepts an Excel file and processes it via a queued job.
The import maps columns to question fields, validates each row, and skips invalid ones rather than failing the entire import:
php
// app/Jobs/ImportQuestionsJob.php
public function handle()
{
    $rows = Excel::toArray([], $this->filePath)[0];

    foreach ($rows as $index => $row) {
        if ($index === 0) continue; // skip header

        try {
            $this->processRow($row);
        } catch (\Exception $e) {
            // Log the failed row, continue with the rest
            ImportError::create([
                'import_id' => $this->importId,
                'row'       => $index + 1,
                'reason'    => $e->getMessage(),
            ]);
        }
    }

    // Notify admin when import completes
    $this->notifyAdmin();
}
After the job completes, the admin receives a summary: X questions imported successfully, Y rows skipped with reasons. This means a teacher can import 500 questions from a spreadsheet in one action and get a clear report of anything that didn't make it through.
The platform has three user roles with distinct capabilities:
Role | Capabilities |
|---|---|
Super Admin | Full access — manage schools, users, question banks, exams, results |
Teacher | Create/manage own question banks, schedule exams, view results for their exams |
Student | Attempt assigned exams, view own results only |
I implemented this using Laravel's Gates and Policies rather than a package — the role structure was simple enough that a package would have been overkill:
php
// app/Providers/AuthServiceProvider.php
Gate::define('manage-question-bank', function (User $user, QuestionBank $bank) {
    return $user->isAdmin() || $bank->created_by === $user->id;
});

Gate::define('view-results', function (User $user, ExamAttempt $attempt) {
    return $user->isAdmin()
        || $user->isTeacher() && $attempt->exam->created_by === $user->id
        || $attempt->student_id === $user->id;
});
The admin panel's Vue.js components also conditionally render UI elements based on the authenticated user's role — passed down from Inertia's shared data on every page load.
The Flutter developer and I worked from a shared API contract defined before any code was written. A few design decisions that made the integration smooth:
Consistent response envelope. Every API response follows the same structure so the Flutter app can handle success and error states uniformly:
json
{
  "success": true,
  "data": { ... },
  "message": "Exam started successfully"
}
Exam state machine. Each exam attempt has a status field that follows a strict state machine: pending → active → submitted → graded (or terminated). The Flutter app always knows what state it's in and what actions are valid.
Pagination on all list endpoints. Question lists, exam lists, result lists — all paginated with consistent per_page, current_page, and total fields. This prevented memory issues when schools had large question banks.
Eager loading everywhere. Exam detail endpoints return the exam, its questions, and the student's existing answers in a single request — no waterfall of API calls on the Flutter side to assemble a screen.
After an exam is submitted, the platform auto-grades all supported question types immediately. Results are available to students within seconds of submission.
The admin panel's analytics view shows per-exam and per-student breakdowns:
Score distribution across all students
Question-level analytics — which questions had the highest wrong-answer rate
Per-student attempt timeline including focus events
Exportable result sheets
Design the data model for all question types upfront. Adding a new question type to a rigid schema mid-project is painful. A flexible JSON-based structure with a shared grading interface made adding each new type additive rather than disruptive.
Server-authoritative timers are non-negotiable for exam integrity. Client clocks are untrustworthy. Derive remaining time from server timestamps on every response.
Define the API contract before writing code. Working from a shared contract with the Flutter developer meant we could build in parallel without stepping on each other. Integration was smooth because the shapes were agreed on upfront.
Cheat prevention needs a human in the loop. Auto-termination is fast but blunt — a student's app can background for legitimate reasons (a phone call, a low battery warning). The admin approval gate adds a fairness layer without removing accountability. The student explains, the admin decides.
Separate temp storage from final results. Partial answers from a suspended exam don't belong in the results table until the exam is over and verified. A temp table acts as a clean holding area with no risk of polluting graded results with incomplete data.
Gate results behind the exam end date, not just submission. Releasing results per-student as they finish creates an unfair advantage. Holding all results until the exam window closes levels the playing field without extra complexity.
Interested in how a specific part of this was built? Feel free to reach out via the contact page — happy to go deeper on any of the technical decisions.
--- ## 3. Software Projects ### Project: CloudSaviour | AWS Mnoitoring System - **URL**: https://sudhirrajai.com/work/cloudsaviour-aws-mnoitoring-system - **Year**: 2026 - **Summary**: CloudSaviour is an AWS infrastructure monitoring and optimization platform designed to help teams manage cloud resources, reduce unnecessary costs, and automate infrastructure operations from a centralized dashboard. It provides real-time monitoring, intelligent insights, automated scheduling, and actionable recommendations for AWS environments. - **Highlights**: Real-time monitoring for EC2, RDS, EBS, and Elastic IP resources; Detect unused or underutilized AWS resources to reduce cloud costs; AI-powered infrastructure recommendations and optimization insights; Automated instance and RDS scheduling (auto start/stop); Cost analysis dashboard with usage breakdowns and optimization tracking; Manage unattached EBS volumes and unused Elastic IPs; Infrastructure alerts, notifications, and quick-fix actions; Multi-workspace support for managing multiple AWS environments; Role-based multi-user collaboration and access management; Resource health monitoring and performance analytics; Centralized AWS operations dashboard built with Laravel and Vue.js; Automation workflows for infrastructure efficiency and cloud savings --- ### Project: Nimbus - **URL**: https://sudhirrajai.com/work/nimbus - **Year**: 2025 - **Summary**: A self-hosted VPS control panel to manage domains, files, PHP, Nginx, cron, databases & backups from a unified dashboard. - **Highlights**: Built a self-hosted VPS control panel managing domains, files, PHP versions, Nginx config, Supervisor, cron jobs, databases and backups.; Implemented automated code deployment via the GitHub Releases API, enabling a lightweight CI/CD pipeline for auto-updates.; Designed modular architecture using Laravel + Vue.js + Inertia.js for clean separation of concerns and extensibility. --- ### Project: LaraSafe - **URL**: https://sudhirrajai.com/work/larasafe - **Year**: 2025 - **Summary**: Automated project backup tool with full / files-only / DB-only modes and configurable scheduling. - **GitHub**: https://github.com/sudhirrajai/LaraSafe - **Highlights**: Developed automated backups supporting full project, files-only, or DB-only modes with configurable scheduling.; Integrated cloud storage destinations including Amazon S3, Backblaze B2, and Wasabi for cost-effective backup strategies.; Built a clean admin UI for managing backup configurations, schedules, and restore operations. --- ### Project: CRM — Client Management - **URL**: https://sudhirrajai.com/work/crm-client-management - **Year**: 2025 - **Summary**: Full-featured CRM with automation, Kanban boards, real-time team chat and financial reporting. - **Highlights**: Built a full-featured CRM with triggered email workflows, Kanban deal/task tracking, and client management.; Implemented real-time live group discussion using Laravel Reverb WebSockets for instant team communication.; Implemented financial modules: expenses, invoices, P&L reports, and analytics dashboards.; Designed a role-based access control system with granular user and permission management. --- ### Project: Village On Web - **URL**: https://sudhirrajai.com/work/village-on-web - **Year**: 2024 - **Summary**: Web application to digitalize village data with automated multi-database support per village. - **Highlights**: Digitalized village records with an automated multi-database structure improving data accessibility by 30%.; Built scripts that dynamically provision new databases, ensuring scalable architecture. --- ### Project: TILD - **URL**: https://sudhirrajai.com/work/tild - **Year**: 2024 - **Summary**: Interactive UI and admin panel with consistent responsive performance across devices. - **Highlights**: Built interactive UI and admin panel for smooth management and user-friendly experience.; Designed a responsive frontend with Bootstrap and PHP, ensuring consistent performance across devices. --- ### Project: Quick Transport - **URL**: https://sudhirrajai.com/work/quick-transport - **Year**: 2022 - **Summary**: Logistics platform allowing users to post goods and hire trucks, with a full admin dashboard. - **Highlights**: Developed a logistics platform allowing users to post goods and hire trucks.; Implemented an admin dashboard to manage bids, users, and contact queries. --- ## 4. Published Engineering Articles & Blog Posts ### Article: Why I Built My Own VPS Control Panel Instead of Using Laravel Forge - **URL**: https://sudhirrajai.com/blog/why-i-built-my-own-vps-control-panel-instead-of-using-laravel-forge - **Date**: 2026-07-25 - **Excerpt**: I built Nimbus — a self-hosted VPS control panel in Laravel and Vue.js — because Forge was expensive, I wanted to learn, and I needed something I fully owned. Here's what I built, what broke, and what I learned. #### Article ContentEvery developer managing a VPS eventually hits the same wall: the server is powerful, but interacting with it means SSH sessions, manual Nginx edits, and hoping you don't typo a config that takes down a live site.
Tools like Laravel Forge solve this beautifully — but they come with a monthly subscription, and more importantly, they're someone else's system. You don't know what's happening under the hood, and you can't customize it.
So I built Nimbus — my own self-hosted VPS control panel. Not because it was the easiest path, but because Forge was expensive, I wanted to understand what these tools actually do under the hood, and I needed something I fully owned and could extend however I wanted.
Here's the honest story of what I built, what was harder than expected, and what I'd do differently.
Nimbus is a web-based dashboard that lets me manage my VPS without ever opening an SSH session for routine tasks. Built with Laravel + Vue.js + Inertia.js, it runs on the same server it manages.
The full feature set:
Feature | What it does |
|---|---|
Domain Management | Add, configure, and remove domains with Nginx server blocks |
Nginx Config Management | View and edit Nginx configs per site from the browser |
PHP Version Switching | Switch PHP versions per site via php-fpm pools |
File Manager | Browse, upload, edit, and delete files on the server |
Database Management | Create/drop MySQL databases and users |
Cron Job Management | Add, edit, and remove crontab entries |
Supervisor Management | Manage process groups — start, stop, restart workers |
Backups | Scheduled file and database backups |
Every one of these features is, under the hood, a Laravel action that runs a shell command on the server and returns the output. Which brings me to the hardest parts.
Forge costs money every month. For personal projects and client work at my scale, paying a monthly subscription for every server adds up. Nimbus runs on the same VPS it manages — one-time setup, no recurring cost.
I wanted to understand what these tools actually do. It's one thing to click "Add Domain" in Forge and have it work. It's another to understand that clicking that button generates an Nginx server block, writes it to /etc/nginx/sites-available/, symlinks it to sites-enabled/, and reloads Nginx. Building Nimbus forced me to learn this at every layer.
I needed something I could fully customize. Commercial panels are general-purpose. Nimbus is built exactly for how I work — my backup strategy, my deployment flow, my preferred Nginx config structure. No compromise, no workarounds.
Nimbus runs on the server it manages. The Laravel backend executes shell commands using PHP's exec() and shell_exec() functions, processes the output, and returns it to the Vue.js frontend via Inertia.js.
Browser (Vue.js + Inertia.js)
        ↕
Laravel Application (running on the VPS)
        ↕
Shell commands (exec, shell_exec)
        ↕
Linux system (Nginx, PHP, MySQL, Supervisor, crontab)
This co-location is both the strength and the risk of the architecture. The app has direct access to system resources — no API layer, no remote agent needed. But it also means a bug in the application could affect the server it's running on.
Adding a domain in Nimbus generates an Nginx server block and activates it:
php
public function addDomain(Request $request): void
{
    $domain   = $request->validated('domain');
    $root     = "/var/www/{$domain}/public";
    $phpSock  = "unix:/var/run/php/php8.2-fpm.sock";

    $config = <<<NGINX
server {
    listen 80;
    server_name {$domain} www.{$domain};
    root {$root};
    index index.php index.html;

    location / {
        try_files \$uri \$uri/ /index.php?\$query_string;
    }

    location ~ \.php$ {
        fastcgi_pass {$phpSock};
        fastcgi_param SCRIPT_FILENAME \$realpath_root\$fastcgi_script_name;
        include fastcgi_params;
    }
}
NGINX;

    $configPath = "/etc/nginx/sites-available/{$domain}";
    file_put_contents($configPath, $config);

    // Enable the site
    exec("ln -sf {$configPath} /etc/nginx/sites-enabled/{$domain}");

    // Test config before reloading — never reload a broken config
    exec("nginx -t 2>&1", $output, $exitCode);

    if ($exitCode !== 0) {
        unlink($configPath);
        unlink("/etc/nginx/sites-enabled/{$domain}");
        throw new \RuntimeException("Nginx config test failed: " . implode("\n", $output));
    }

    exec("systemctl reload nginx");
}
The nginx -t test before reloading is critical. If you reload Nginx with a broken config, the server stops serving all sites — including Nimbus itself. Testing first and rolling back on failure prevents that scenario.
Each domain can run a different PHP version by pointing its Nginx fastcgi_pass to the appropriate php-fpm socket:
php
public function switchPhpVersion(string $domain, string $version): void
{
    // e.g. version = "8.1", "8.2", "8.3"
    $socket     = "unix:/var/run/php/php{$version}-fpm.sock";
    $configPath = "/etc/nginx/sites-available/{$domain}";

    $current = file_get_contents($configPath);

    // Replace whichever php version is currently set
    $updated = preg_replace(
        '/fastcgi_pass unix:\/var\/run\/php\/php[\d.]+\-fpm\.sock;/',
        "fastcgi_pass {$socket};",
        $current
    );

    file_put_contents($configPath, $updated);

    exec("nginx -t 2>&1", $output, $exitCode);

    if ($exitCode !== 0) {
        // Restore original on failure
        file_put_contents($configPath, $current);
        throw new \RuntimeException("PHP switch failed: " . implode("\n", $output));
    }

    exec("systemctl reload nginx");
}Managing queue workers without SSH:
php
public function restartWorker(string $program): array
{
    exec("supervisorctl restart {$program} 2>&1", $output, $exitCode);

    return [
        'success' => $exitCode === 0,
        'output'  => implode("\n", $output),
    ];
}

public function getWorkerStatus(): array
{
    exec("supervisorctl status 2>&1", $output);

    return collect($output)->map(function ($line) {
        // Parse: "program-name    RUNNING   pid 1234, uptime 0:05:23"
        preg_match('/^(\S+)\s+(\S+)\s+(.*)$/', $line, $matches);
        return [
            'name'   => $matches[1] ?? $line,
            'status' => $matches[2] ?? 'UNKNOWN',
            'info'   => $matches[3] ?? '',
        ];
    })->toArray();
}Reading and writing crontab programmatically:
php
public function getCronJobs(): array
{
    exec("crontab -l 2>/dev/null", $output);
    return array_filter($output, fn($line) => !empty(trim($line)) && !str_starts_with(trim($line), '#'));
}

public function addCronJob(string $schedule, string $command): void
{
    $existing = $this->getCronJobs();
    $existing[] = "{$schedule} {$command}";
    $this->writeCrontab($existing);
}

private function writeCrontab(array $lines): void
{
    $content  = implode("\n", $lines) . "\n";
    $tmpFile  = tempnam(sys_get_temp_dir(), 'cron_');
    file_put_contents($tmpFile, $content);
    exec("crontab {$tmpFile}");
    unlink($tmpFile);
}This was the most uncomfortable part of building Nimbus. Every feature is essentially a web interface to a shell command that can modify the server. If someone gains access to the Nimbus dashboard, they have significant control over the machine.
The mitigations I put in place:
Authentication with Sanctum. Nimbus is protected behind Laravel Sanctum — no unauthenticated requests reach any server command.
Input sanitization on every shell argument. Any user input that goes into a shell command is sanitized before execution. I use escapeshellarg() on all arguments to prevent command injection:
php
// ❌ Never do this
exec("rm -rf /var/www/{$domain}");

// ✅ Always escape user input
exec("rm -rf " . escapeshellarg("/var/www/{$domain}"));
Command whitelisting. Nimbus doesn't accept arbitrary shell input. Every action maps to a specific, hardcoded command in a service class. There's no "run this command" field anywhere in the UI — only predefined actions.
Restricted to localhost. Nimbus is configured to only be accessible from specific IPs or via an SSH tunnel. It's never exposed on a public URL.
No root execution. All commands run as the www-data user with specific sudo permissions granted only for the commands Nimbus needs. Nothing runs as root.
Even with all of this, self-hosting a server control panel carries inherent risk. This is a tool I built for myself — I'd think carefully before deploying it in a multi-user or client environment without a thorough security audit.
Some operations take time — pulling a GitHub release, running Composer install, running migrations. The user needs to see what's happening in real time, not stare at a spinner and hope.
The naive approach — run the command and return the output when it's done — doesn't work for long-running processes. The browser times out, or the user has no idea if anything is happening.
The approach I settled on: run the command in the background, write its output to a log file line by line, and stream that log to the frontend via Server-Sent Events (SSE):
php
// Execute command and stream output
public function streamCommand(string $command, string $logFile): void
{
    $handle = popen("{$command} 2>&1", 'r');

    while (!feof($handle)) {
        $line = fgets($handle);
        if ($line !== false) {
            file_put_contents($logFile, $line, FILE_APPEND);
        }
    }

    pclose($handle);
}
php
// SSE endpoint — streams log file to browser
public function streamLog(Request $request, string $logId): StreamedResponse
{
    $logFile = storage_path("logs/commands/{$logId}.log");

    return response()->stream(function () use ($logFile) {
        $position = 0;

        while (true) {
            if (file_exists($logFile)) {
                $content = file_get_contents($logFile);
                $newContent = substr($content, $position);

                if (!empty($newContent)) {
                    echo "data: " . json_encode(['line' => $newContent]) . "\n\n";
                    ob_flush();
                    flush();
                    $position = strlen($content);
                }

                // Check for completion marker
                if (str_contains($content, '__DONE__')) {
                    echo "data: " . json_encode(['done' => true]) . "\n\n";
                    ob_flush();
                    flush();
                    break;
                }
            }

            sleep(1);
        }
    }, 200, [
        'Content-Type'      => 'text/event-stream',
        'Cache-Control'     => 'no-cache',
        'X-Accel-Buffering' => 'no', // Important: disables Nginx buffering
    ]);
}
The X-Accel-Buffering: no header is critical when running behind Nginx. Without it, Nginx buffers the SSE response and the browser receives everything in one dump at the end — defeating the whole point.
On the Vue.js side:
javascript
const eventSource = new EventSource(`/api/stream-log/${logId}`);

eventSource.onmessage = (event) => {
    const data = JSON.parse(event.data);

    if (data.done) {
        eventSource.close();
        return;
    }

    terminalOutput.value += data.line;
    scrollToBottom();
};
The result: a terminal-like output window in the browser that shows command output line by line as it runs — the same feel as watching a deployment in your actual terminal, but in a web UI.
Separate the app server from the managed server. Nimbus currently runs on the server it manages. A bad deploy or app error could affect the control panel itself. Ideally, Nimbus would run on a separate lightweight server and connect to managed servers via SSH with key-based auth. This is the architecture proper tools like Forge use.
Add audit logging from day one. Every action Nimbus takes — restart a worker, reload Nginx, modify a cron job — should be logged with a timestamp and the action taken. I added this later, but building it in from the start would have made debugging much easier.
Use a proper job queue for long operations. I stream command output directly via SSE, which works but ties up a PHP process for the duration of the command. A better approach: dispatch a queued job, and use WebSockets or polling to report progress.
Building tools you use yourself is the best way to learn infrastructure. Every feature in Nimbus forced me to understand how Nginx, PHP-FPM, Supervisor, and crontab actually work — not just how to click buttons that configure them.
nginx -t before every reload. A broken Nginx config that gets reloaded takes down every site on the server, including the panel you're using to fix it. Always test, always have a rollback.
escapeshellarg() on every user input that touches a shell command. No exceptions. Command injection via a web UI is a serious vulnerability.
X-Accel-Buffering: no is required for SSE behind Nginx. Without it, your real-time output isn't real-time.
Co-locating a control panel with the server it manages is a convenient tradeoff, not a best practice. Fine for personal use, think carefully before production.
Curious about a specific part of Nimbus — the backup system, the file manager, or the CI/CD flow? Drop a comment or reach out — happy to go deeper on any of it.
--- ### Article: Controlling AWS EC2 Access with IAM Policies, User Groups, and Environment Tags - **URL**: https://sudhirrajai.com/blog/controlling-aws-ec2-access-with-iam-policies-user-groups-and-environment-tags - **Date**: 2026-07-16 - **Excerpt**: Learn how to use AWS IAM to control EC2 access by environment — create tag-based policies, set up user groups, and test permissions. A practical hands-on guide with real policy JSON explained line by line. #### Article ContentOne of the first real challenges when working with AWS in a team is figuring out who should have access to what. Giving everyone full admin access is a disaster waiting to happen — someone stops the wrong EC2 instance, or worse, deletes a production resource.
I recently practiced this exact problem using AWS IAM: how to give a user access to a development EC2 instance but completely block them from touching the production instance — using nothing but tags and a JSON policy. Here's exactly what I did and how it works.
Two EC2 instances — one for production, one for development. A developer (or intern) should be able to start, stop, and manage the dev instance freely, but should have zero access to the production instance.
The solution: tag-based IAM policies + user groups. No hardcoded instance IDs, no per-user policies — just clean, scalable access control driven by resource tags.
The entire access control strategy hinges on EC2 tags. Tags are key-value pairs you attach to AWS resources — they're used for organization, billing, and crucially, policy conditions.
I launched two EC2 instances and tagged them:
Production instance:
Name: prod
Tag → Key: Env, Value: production
Development instance:
Name: dev
Tag → Key: Env, Value: dev
The Env tag is what the IAM policy will check. Any instance tagged Env: dev will be accessible; anything else won't be.
Why tags instead of instance IDs? Instance IDs change when you terminate and relaunch an instance. Tags don't. A tag-based policy covers every future dev instance automatically — you never have to update the policy when infrastructure changes.
This is the core of the whole setup. Here's the policy I created:
json
{
    "Version": "2012-10-17",
    "Statement": [
        {
            "Effect": "Allow",
            "Action": "ec2:*",
            "Resource": "*",
            "Condition": {
                "StringEquals": {
                    "ec2:ResourceTag/Env": "dev"
                }
            }
        },
        {
            "Effect": "Allow",
            "Action": "ec2:Describe*",
            "Resource": "*"
        },
        {
            "Effect": "Deny",
            "Action": [
                "ec2:DeleteTags",
                "ec2:CreateTags"
            ],
            "Resource": "*"
        }
    ]
}
Let me break down each statement clearly.
json
{
    "Effect": "Allow",
    "Action": "ec2:*",
    "Resource": "*",
    "Condition": {
        "StringEquals": {
            "ec2:ResourceTag/Env": "dev"
        }
    }
}
"Action": "ec2:*" — allows every EC2 action: start, stop, reboot, terminate, everything
"Resource": "*" — applies to all resources
"Condition" — but only when the resource has the tag Env = dev
The condition is what makes this policy surgical. Without it, ec2:* on * would be dangerously broad. The tag condition scopes it down to only dev instances.
json
{
    "Effect": "Allow",
    "Action": "ec2:Describe*",
    "Resource": "*"
}
ec2:Describe* covers all read/list operations — DescribeInstances, DescribeRegions, DescribeSecurityGroups, etc. These are needed for the user to actually see the EC2 console and list instances.
Without this statement, a user with only Statement 1 would see a blank EC2 console with "Access Denied" errors everywhere — they'd have permission to act on dev instances but no ability to see them in the first place.
This is a common gotcha: describe permissions are separate from action permissions in EC2.
json
{
    "Effect": "Deny",
    "Action": [
        "ec2:DeleteTags",
        "ec2:CreateTags"
    ],
    "Resource": "*"
}
This is the security-critical statement that most people miss.
Think about it: if a user can modify tags, they could change the production instance's Env tag from production to dev — and suddenly Statement 1 gives them full access to it. The entire access control model collapses.
By explicitly denying ec2:CreateTags and ec2:DeleteTags on all resources, the user cannot manipulate tags — and therefore cannot escalate their own privileges.
Important: In IAM,
Denyalways overridesAllow. Even if another policy somewhere grants tag creation, this explicit Deny wins. That's why you want Deny for security-critical rules like this.
Rather than attaching the policy directly to a user, I attached it to a User Group. This is the scalable way to manage permissions.
Why user groups?
If you have 5 developers who all need the same dev access, you don't create 5 separate policy attachments. You create one group, attach the policy once, and add all 5 users to the group. When permissions change, you update one policy — not five users.
IAM User Group: dev-group
    └── Attached Policy: DevEnvironmentPolicy
            └── Users: dev-user-1, dev-user-2, ...
Steps I followed:
Go to IAM → User Groups → Create group
Name: dev-group
Attach permissions policy: the DevEnvironmentPolicy we just created
Create the group
Next, I created an IAM user for the developer:
IAM → Users → Create user
Username: dev-user
Enable AWS Management Console access — this gives them a login URL, username, and password
Set a console password
In the permissions step, add the user to dev-group
The user inherits all permissions from the group automatically. No direct policy attachments needed.
This is the most important step — always test your IAM policies before handing over credentials.
I opened a private/incognito browser window and signed in as the new IAM user using their console URL and credentials.
Test 1: Try to stop the production instance
Selected the production EC2 instance → Instance State → Stop.
Result: ❌ Failed — Not Authorized
You are not authorized to perform this operation.
Error: UnauthorizedOperation
Exactly what we wanted. The production instance has Env: production, which doesn't match the policy condition Env: dev — so all actions on it are blocked.
Test 2: Try to stop the development instance
Selected the dev EC2 instance → Instance State → Stop.
Result: ✅ Success — Instance stopping
The dev instance has Env: dev, which satisfies the condition in Statement 1. Full access granted.
It helps to visualize the policy logic as a decision flow:
User tries an EC2 action
        ↓
Is it ec2:CreateTags or ec2:DeleteTags?
        ↓ Yes → DENY (Statement 3 — explicit deny, always wins)
        ↓ No
        ↓
Is it an ec2:Describe* action?
        ↓ Yes → ALLOW (Statement 2)
        ↓ No
        ↓
Does the resource have tag Env = dev?
        ↓ Yes → ALLOW (Statement 1)
        ↓ No → DENY (implicit — no matching allow)
The result: the user can see all instances (describe), act on dev instances (condition-based allow), but cannot touch production instances or manipulate tags.
One small but useful thing I set up: an Account Alias.
By default, your AWS sign-in URL looks like:
https://123456789012.signin.aws.amazon.com/consoleWith an alias:
https://your-alias.signin.aws.amazon.com/consoleSet it in IAM → Dashboard → Account Alias → Create. This is the URL you share with new users — much friendlier than a 12-digit account ID.
Forgetting the Describe permissions. Without ec2:Describe*, users can't see the EC2 console properly. They might technically have permission to start an instance but can't list instances to find it. Always include describe permissions for services you want users to work with.
Not denying tag modifications. This is the privilege escalation hole. If users can change tags, they can change which policy conditions apply to a resource. Always deny CreateTags and DeleteTags in tag-based access control policies.
Attaching policies directly to users. It works, but doesn't scale. Use groups from the start — your future self will thank you when you need to change permissions for 10 users at once.
Testing in the same browser session. Always test IAM users in an incognito window or a completely separate browser. If you test in the same session as your admin account, browser caching can give misleading results.
Tags are the backbone of scalable EC2 access control. Tag your resources by environment from day one — it makes IAM policies far more flexible than hardcoded instance IDs.
Explicit Deny always wins in IAM. Use it for security-critical rules like tag modification, which could otherwise let users bypass your entire policy.
Describe permissions are separate. You need them for users to see and navigate the console, even if they have action permissions on specific resources.
User groups over direct policy attachment. Always. It's the difference between managing permissions for one group vs managing them for every individual user.
Test your policies before sharing credentials. An untested IAM policy is just good intentions — verify it works in a real login session with the actual user credentials.
Exploring AWS IAM and cloud security? This is one of those foundational topics that pays dividends across every AWS service you work with — worth spending time on before moving to more complex services.
--- ### Article: Hosting a Static Website on AWS S3 — Bucket Policies, ACLs, and Public Access Explained - **URL**: https://sudhirrajai.com/blog/hosting-a-static-website-on-aws-s3-bucket-policies-acls-and-public-access-explained - **Date**: 2026-07-03 - **Excerpt**: A practical guide to hosting a static HTML/CSS/JS website on AWS S3 — including the exact bucket policy, how to enable ACLs, unblock public access, and avoid the gotchas that silently block your files. #### Article ContentAWS S3 static hosting sounds simple until you're staring at an AccessDenied error with no clear reason why. You've uploaded your files, enabled static website hosting, but the site just won't load publicly.
The problem is almost always the same: S3 has three separate layers of access control that all have to be configured correctly at the same time. Miss one, and you get blocked — with very little indication of which layer is the culprit.
I ran into all of this while hosting a static HTML/CSS/JS site on S3 for the first time. Here's the complete setup, explained clearly so you don't waste time guessing.
Download Resources from here - S3Resources.
Before jumping into steps, it's worth understanding the three layers you're dealing with:
Layer 1 — Block Public Access settings (account/bucket level) AWS added this as a safety net to prevent accidental public exposure of sensitive buckets. By default, ALL public access is blocked regardless of what your bucket policy or ACLs say. This setting overrides everything else. If it's on, nothing else matters.
Layer 2 — ACLs (Access Control Lists) ACLs are per-object permissions. When you upload a file, you can set its ACL to public-read, which means anyone can read that specific object. But ACLs only work if they're enabled on the bucket — AWS disabled ACLs by default in 2023 for new buckets (ownership is set to "Bucket owner enforced" by default, which disables ACLs entirely).
Layer 3 — Bucket Policy A JSON policy attached to the bucket that defines who can do what. This is the most flexible and recommended way to grant public read access to all objects in a bucket.
The order of precedence: Block Public Access → Bucket Policy / ACLs. If Layer 1 is blocking, Layers 2 and 3 are irrelevant. You need all three aligned.
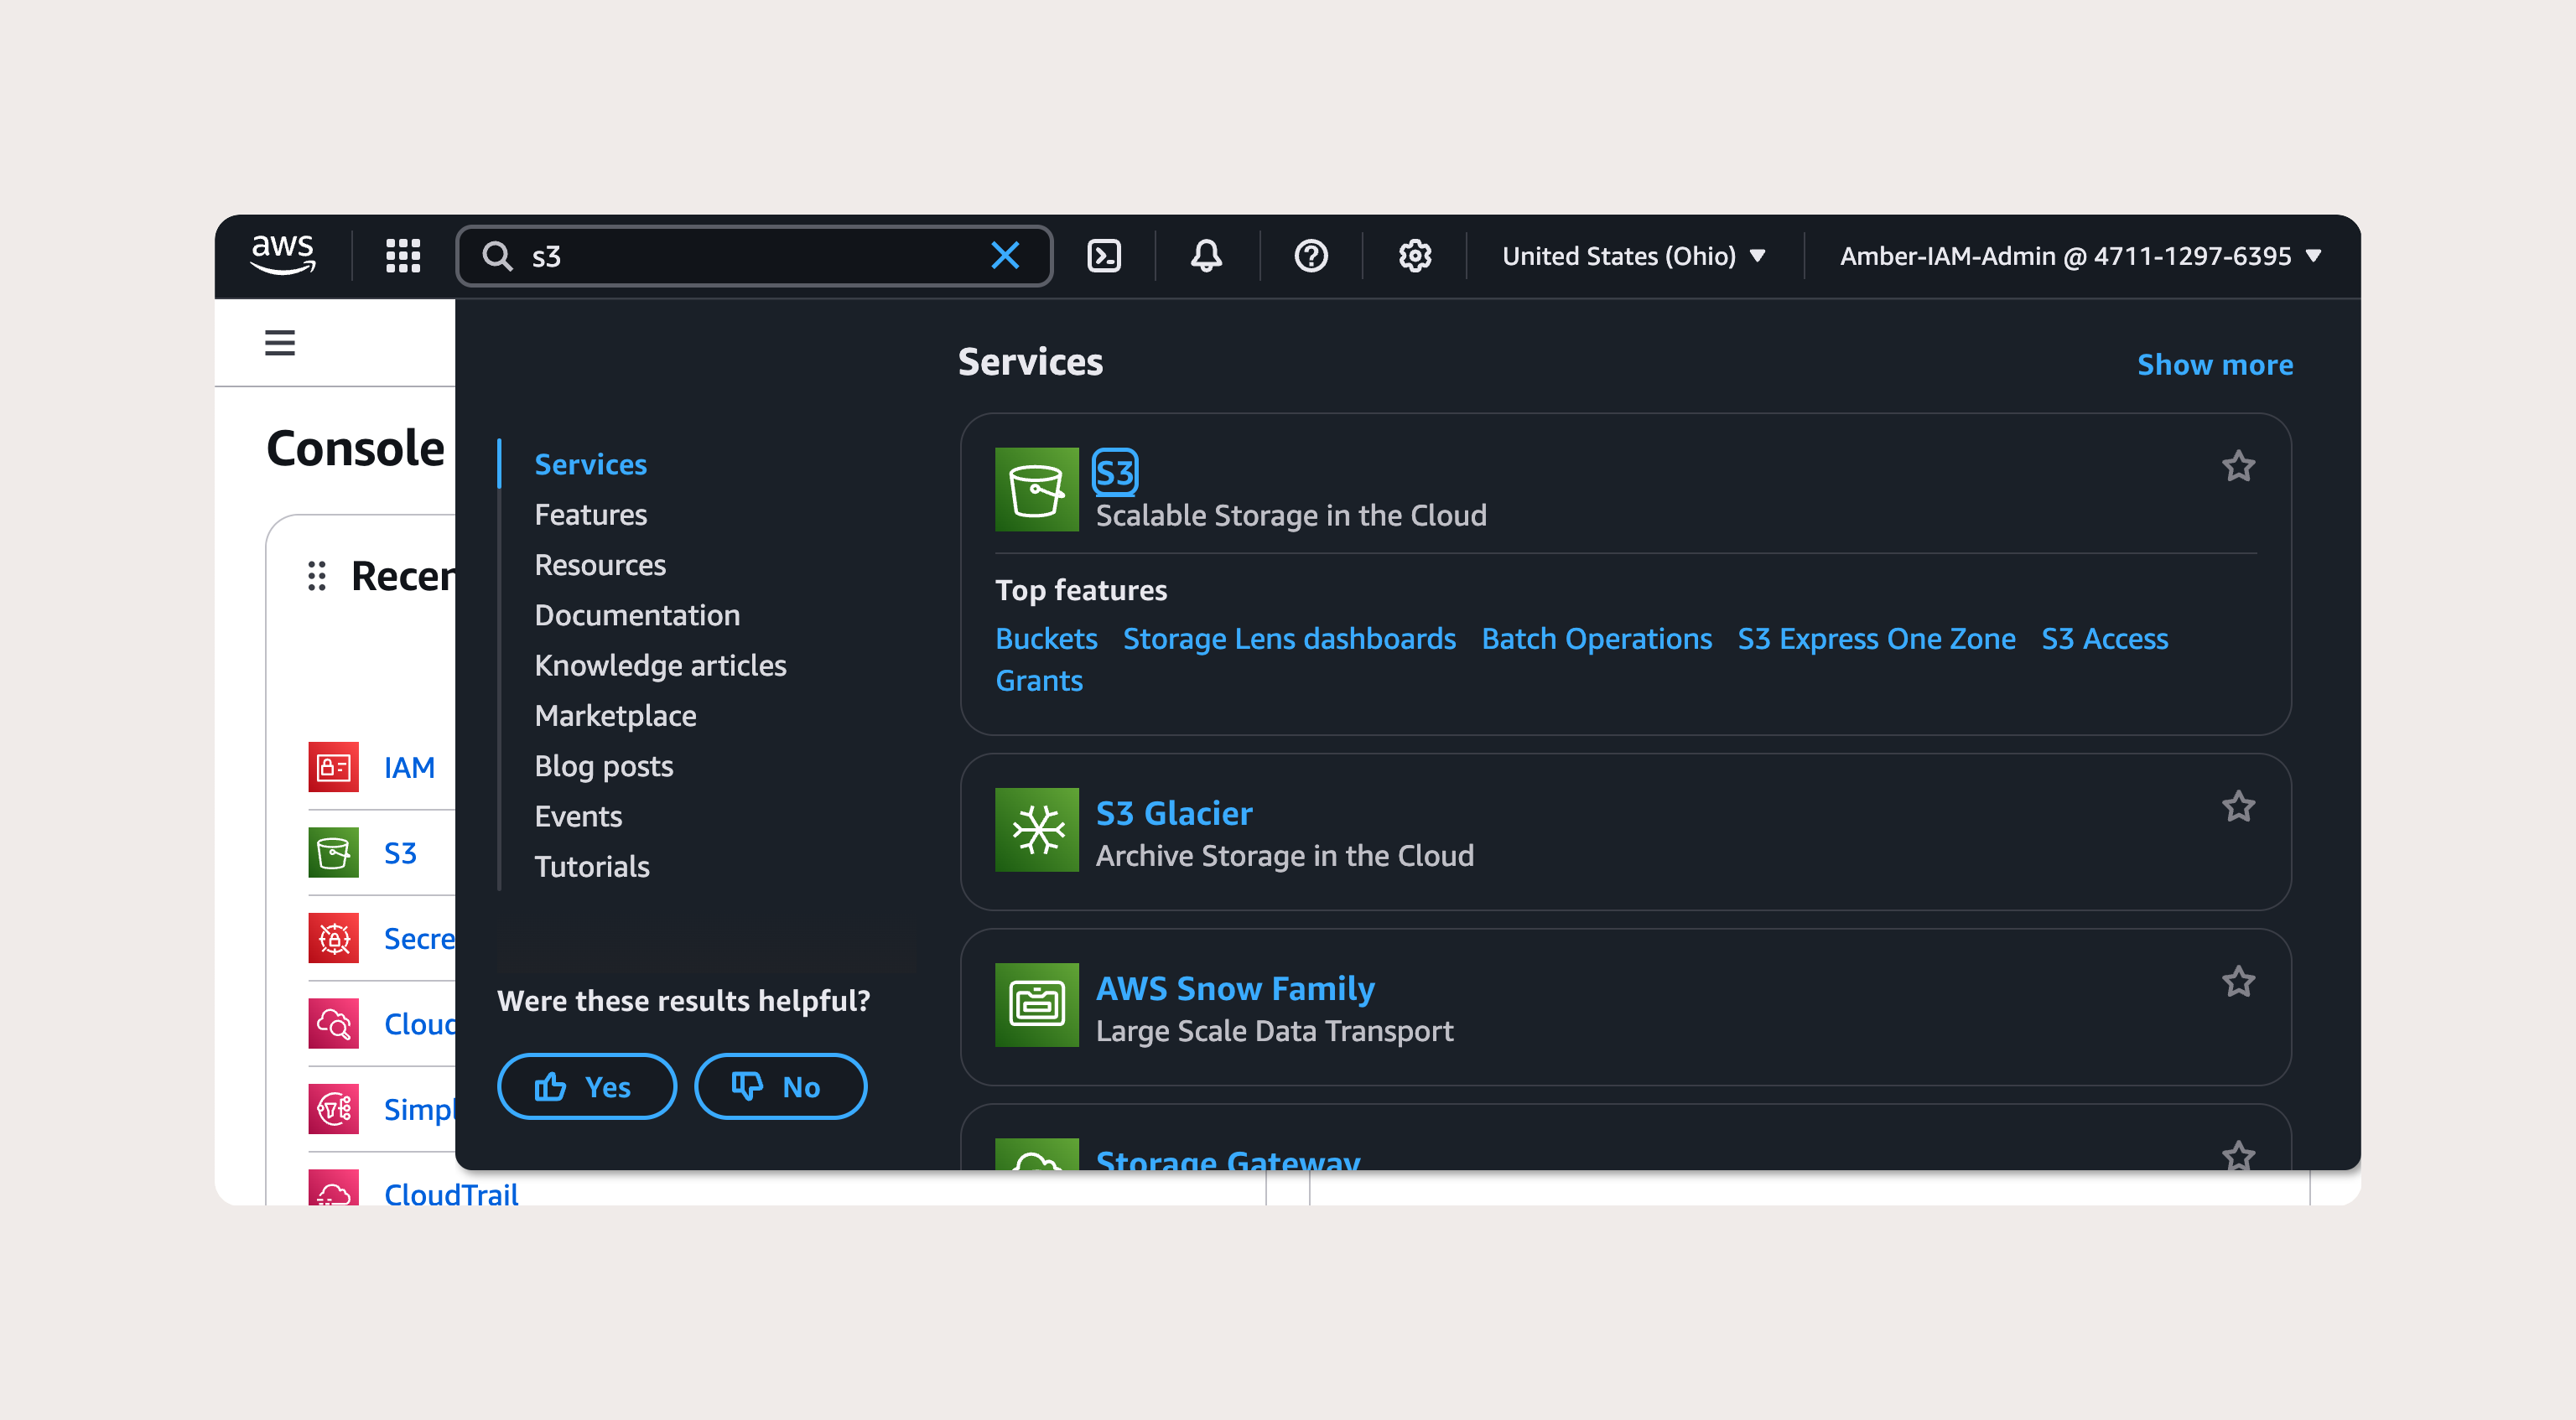
Go to the AWS S3 console and create a new bucket.
A few things to note during creation:
Bucket name — if you plan to use a custom domain later, name the bucket exactly the same as your domain (e.g. sudhirrajai.com). S3 requires this for custom domain routing.
Region — pick the region closest to your users. For a personal portfolio, it doesn't matter much. For production, it affects latency.
Block Public Access — leave this as-is for now (all blocked by default). We'll change it in the next step intentionally, not by accident.
This is Layer 1 — and the most commonly missed step.
In your bucket → Permissions tab → Block public access (bucket settings) → click Edit.
Uncheck "Block all public access" and save. AWS will show a confirmation warning — type "confirm" and proceed.
What each sub-option means:
SettingWhat it blocksBlock public ACLsPrevents new ACLs from granting public accessIgnore public ACLsIgnores existing ACLs even if they grant public accessBlock public bucket policiesPrevents bucket policies from granting public accessRestrict public bucket policiesBlocks public and cross-account access via bucket policy
For static website hosting, you want all four unchecked. This doesn't make your bucket public on its own — it just removes the override that was preventing your policy and ACLs from working.
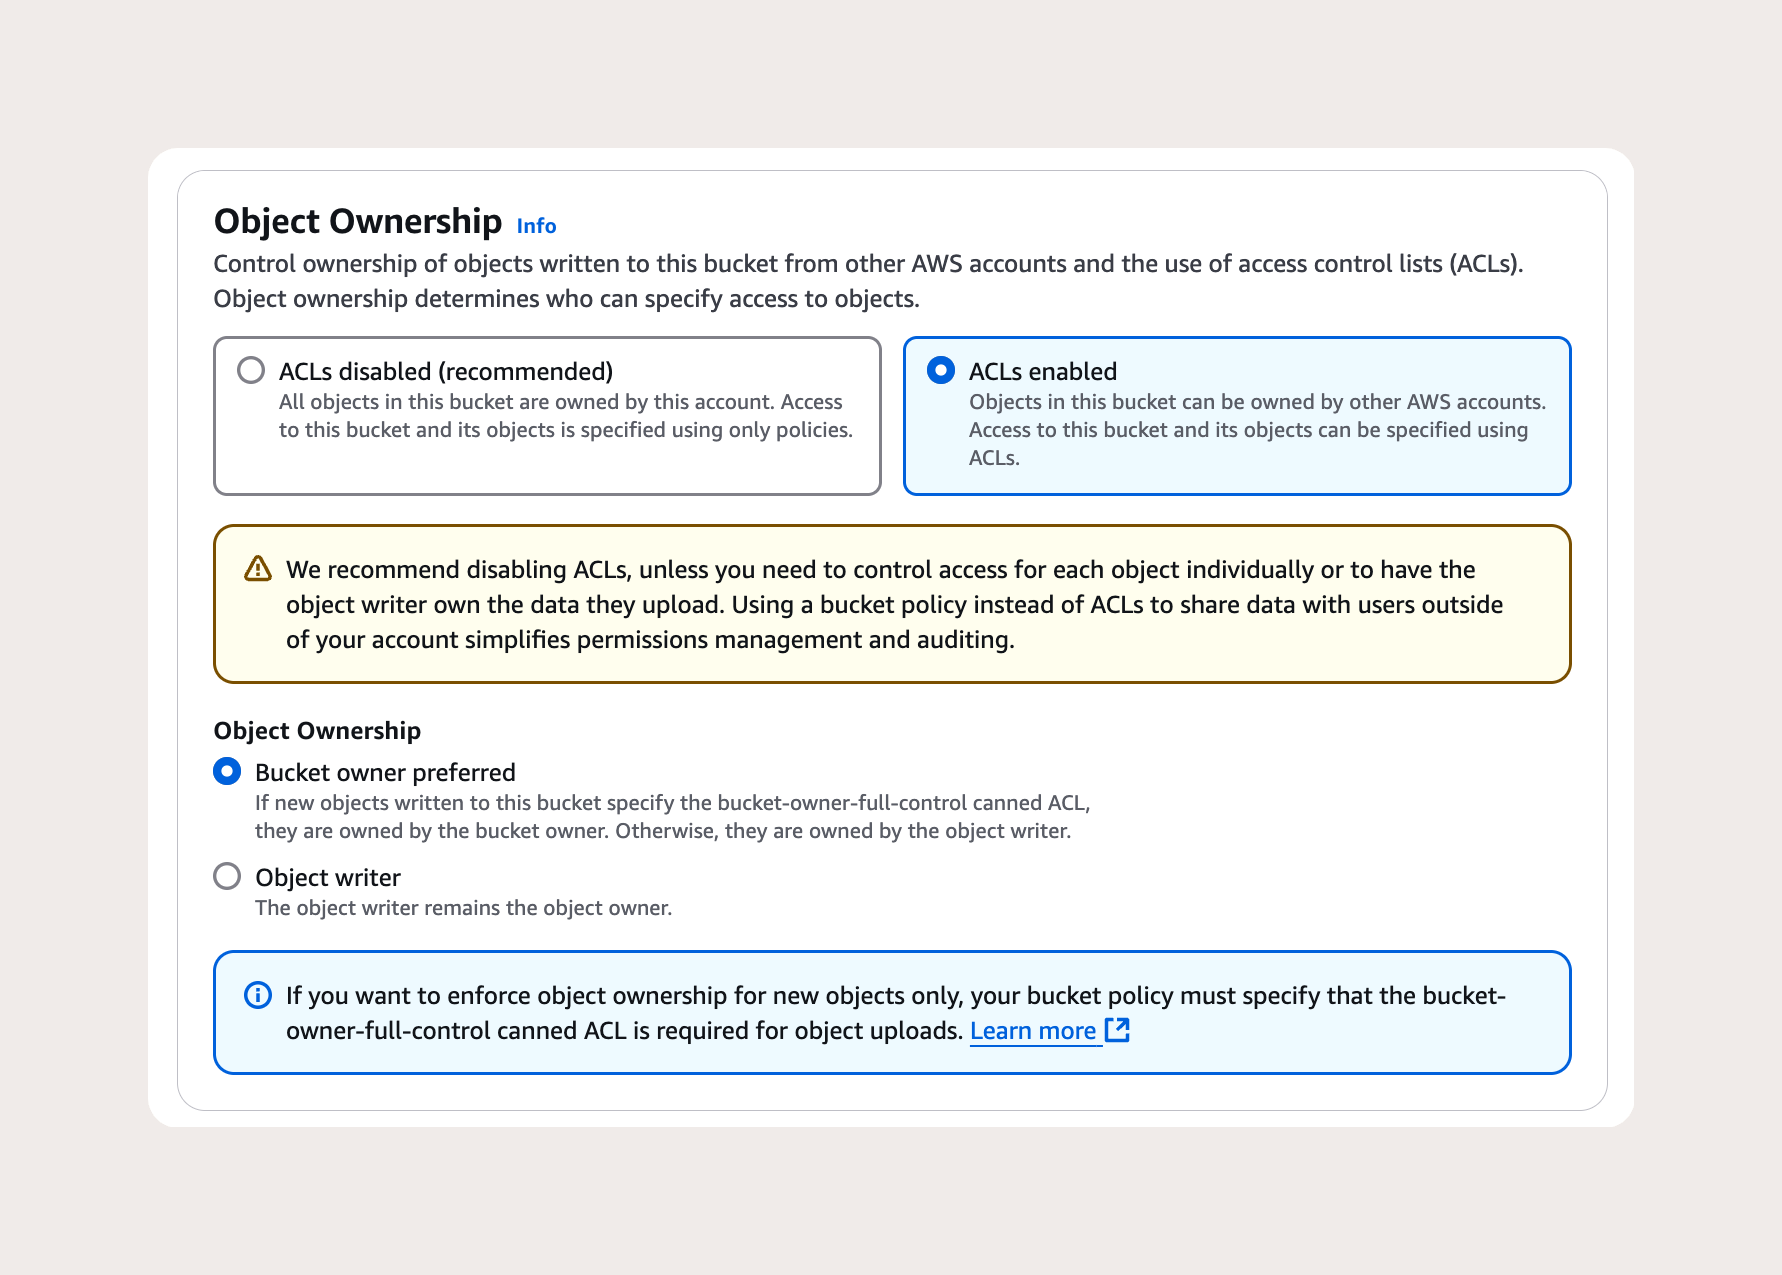
By default, new S3 buckets use "Bucket owner enforced" for Object Ownership, which disables ACLs entirely. If you want to set per-object ACLs (like public-read on upload), you need to change this.
In your bucket → Permissions tab → Object Ownership → click Edit.
Select "ACLs enabled" and choose "Bucket owner preferred". Save.
This re-enables ACLs so you can set public-read on individual objects or use the bucket ACL to grant broad read access.
When do you actually need ACLs vs bucket policy?
Bucket policy — better for granting public read to ALL objects in the bucket at once. One policy covers everything, including future uploads. This is the recommended approach for static hosting.
ACLs — useful when you need per-object control (some files public, some private). For a fully public static site, a bucket policy alone is cleaner.
For this setup, we'll use both — ACLs enabled, but the actual public access granted via bucket policy.
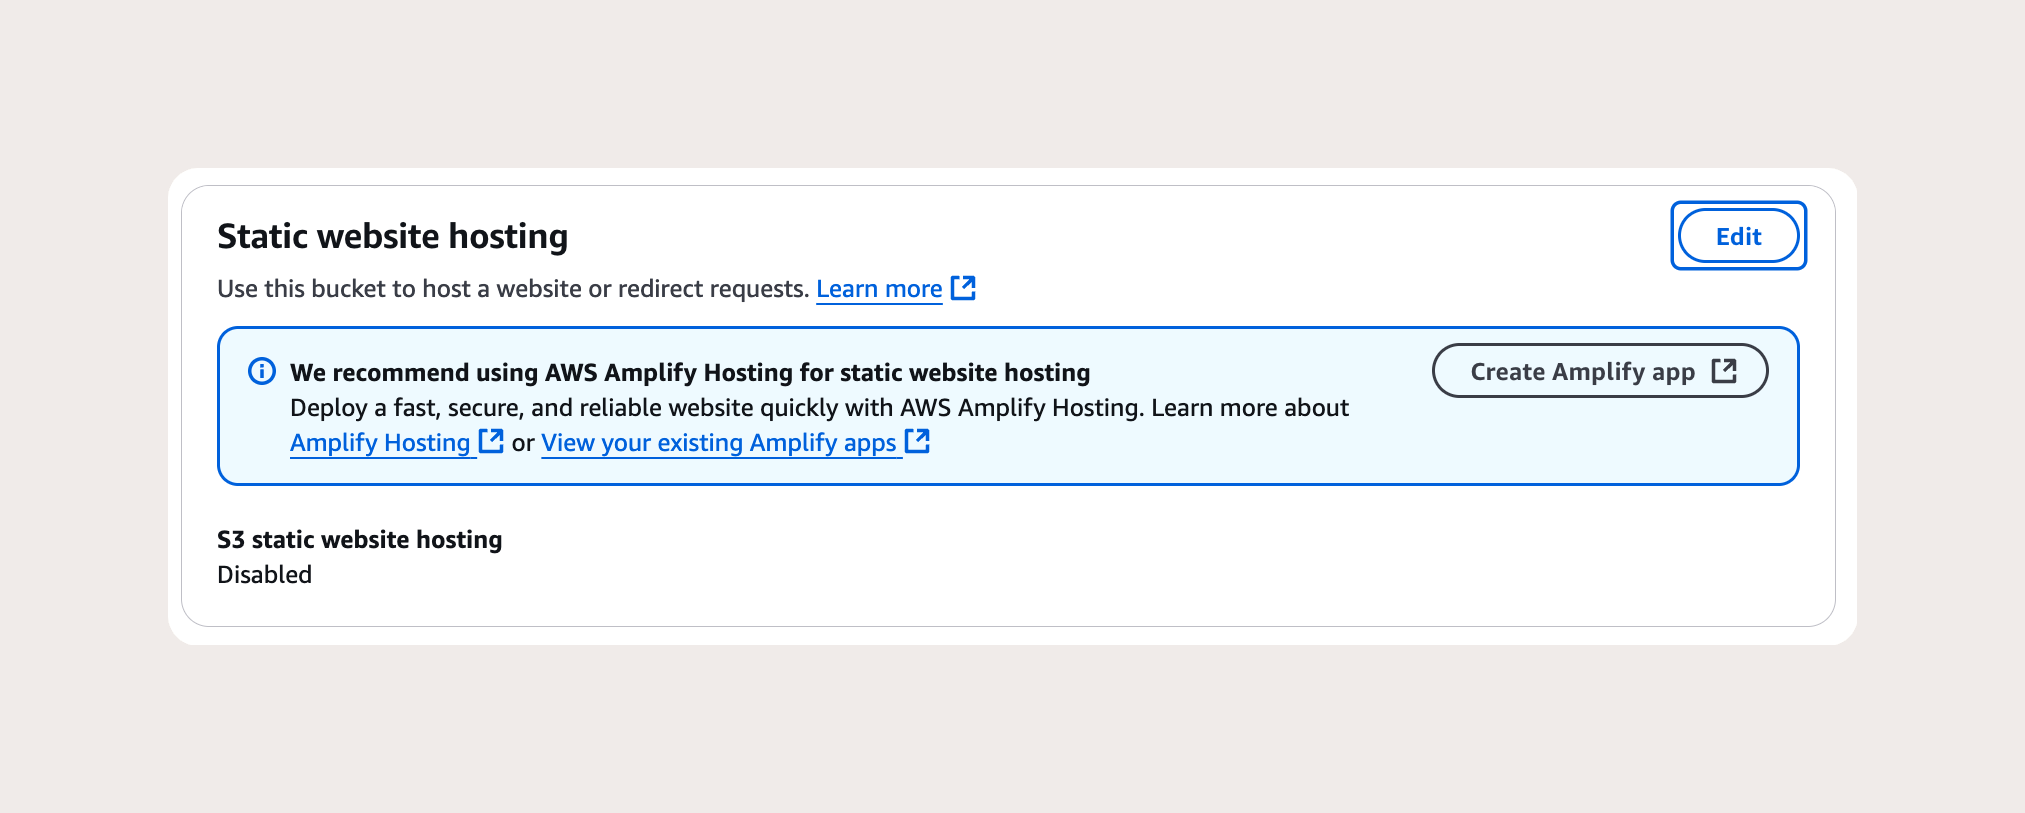
In your bucket → Properties tab → scroll to Static website hosting → click Edit.
Enable static website hosting
Hosting type: Host a static website
Index document: index.html , you can download it from here.
Error document: error.html (or index.html if you're using a SPA with client-side routing)
Save. AWS will show you a Bucket website endpoint URL — something like:
http://your-bucket-name.s3-website.ap-south-1.amazonaws.comNote this URL — it's different from the S3 object URL. The website endpoint handles the index.html default document and error document routing. The object URL doesn't.
This is Layer 3 — and what actually grants public read access to your files.
In your bucket → Permissions tab → Bucket policy → click Edit.
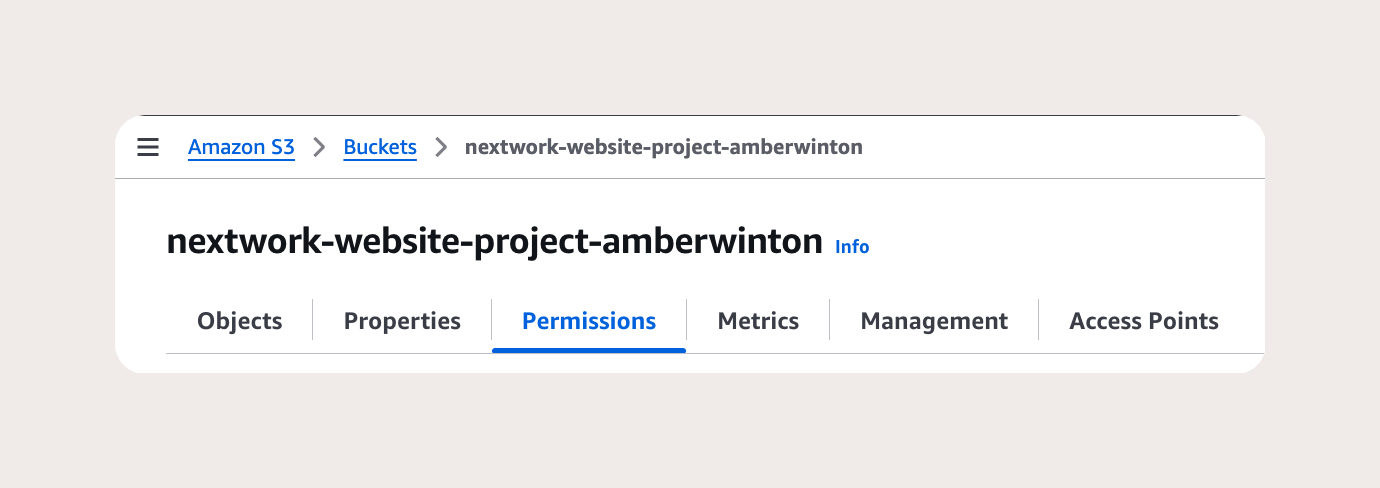
Paste this policy, replacing your-bucket-name with your actual bucket name:
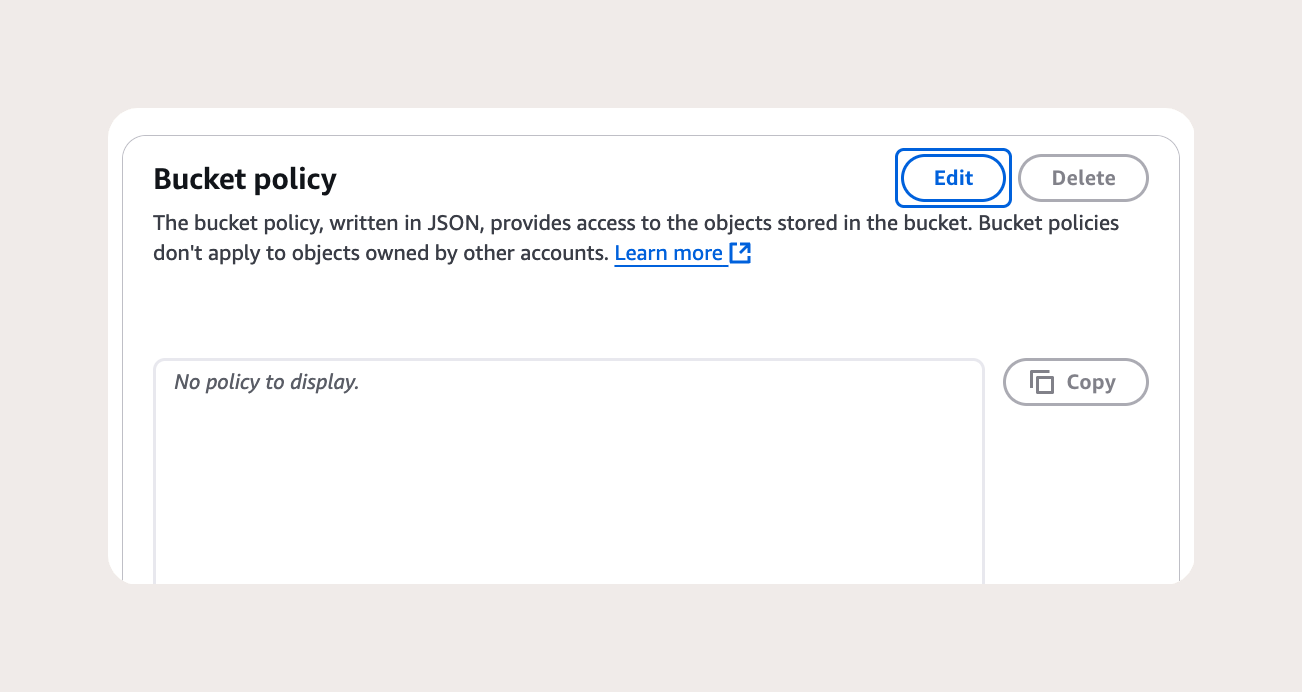
json
{
  "Version": "2012-10-17",
  "Statement": [
    {
      "Sid": "PublicReadGetObject",
      "Effect": "Allow",
      "Principal": "*",
      "Action": "s3:GetObject",
      "Resource": "arn:aws:s3:::your-bucket-name/*"
    }
  ]
}
Breaking this down:
"Principal": "*" — applies to everyone, including anonymous users (the public internet)
"Action": "s3:GetObject" — allows reading/downloading objects (not listing, not writing)
"Resource": "arn:aws:s3:::your-bucket-name/*" — applies to all objects in the bucket (the /* at the end is critical — without it, the policy applies to the bucket itself but not its contents)
Save the policy. If you get an error saying the policy can't be saved, it usually means Block Public Access is still enabled (Step 2 wasn't completed).
Upload your HTML, CSS, JS, and assets to the bucket root. Make sure index.html is at the root level — not inside a subfolder.
bucket-root/
├── index.html
├── style.css
├── script.js
└── assets/
    ├── logo.png
    └── bg.jpg
When uploading via the AWS console, you can leave the default permissions — the bucket policy already grants public read to everything.
If uploading via the AWS CLI:
bash
aws s3 sync ./dist s3://your-bucket-name --acl public-readThe --acl public-read flag sets the ACL on each uploaded object. This is optional if your bucket policy already grants public access, but it's a useful habit when working with mixed-access buckets.
Visit the Bucket website endpoint URL from Step 4. Your site should load.
If you get 403 Forbidden, work through this checklist:
Is Block Public Access fully disabled? (Step 2)
Is the bucket policy saved and correct? Check the Resource ARN ends with /*
Is index.html at the bucket root, not in a subfolder?
Did you visit the website endpoint URL, not the regular S3 object URL? (They're different)
If you get 404 Not Found:
Check that your index document in static website hosting settings matches your actual filename exactly (index.html, not Index.html)
The most common frustration with S3 public hosting is that people fix one layer and assume that's enough. Here's the mental model that makes it click:
Think of S3 access as three padlocks on a door:
Block Public Access — the master lock. Must be unlocked first. Overrides everything.
Object Ownership / ACLs — the second lock. Must be enabled if you want per-object ACL control.
Bucket Policy — the third lock. Defines the actual permissions once the other two allow it.
All three have to be in the right state simultaneously. Fixing two out of three still leaves your content blocked.
This is pure S3 static hosting — simple, cheap, and fast to set up. But it has limitations worth knowing:
No HTTPS on the S3 website endpoint. The bucket website endpoint only supports HTTP. For HTTPS, you need CloudFront in front of S3 — CloudFront handles SSL termination and can use a free ACM certificate.
No custom domain without extra steps. To use yourdomain.com instead of the S3 URL, you need Route 53 (or your DNS provider) pointing to either the S3 endpoint or a CloudFront distribution.
No server-side logic. S3 serves static files only. No PHP, no server-side rendering, no dynamic routes. For SPAs with client-side routing (Vue Router, React Router), set your error document to index.html so all paths serve the app shell — the router handles the rest client-side.
Cold start latency from distant regions. S3 serves from a single region. Users far from that region get slower load times. CloudFront caches your files at edge locations worldwide, solving this.
For a portfolio site or simple static project, plain S3 hosting is perfectly fine. When you need HTTPS, a custom domain, or global performance, the next step is adding CloudFront — which is worth its own article.
Three layers control S3 public access — Block Public Access, ACLs, and Bucket Policy. All three must be correctly configured; fixing two out of three still leaves you blocked.
Block Public Access is a master override — it ignores your bucket policy and ACLs entirely. Disable it first, intentionally.
ACLs are disabled by default on new buckets — change Object Ownership to "ACLs enabled" if you need per-object access control.
The /* at the end of the Resource ARN matters — without it, the policy applies to the bucket itself but not its contents.
Use the website endpoint URL, not the object URL — only the website endpoint handles index.html routing and error documents.
For HTTPS and custom domains, add CloudFront — S3 alone only serves HTTP.
Tried S3 hosting and ran into a different error? Drop a comment — S3 permissions are one of those things where the error messages are rarely helpful, but the fix is usually one of a handful of things.
--- ### Article: Building Real-Time Features in Laravel with Reverb — Live Chat, Group Discussions, and Desktop Push Notifications - **URL**: https://sudhirrajai.com/blog/building-real-time-features-in-laravel-with-reverb-live-chat-group-discussions-and-desktop-push-notifications - **Date**: 2026-06-28 - **Excerpt**: A hands-on guide to building real-time chat, group discussions, and desktop push notifications in Laravel using Reverb and Vue.js — including the auth and frontend connection challenges nobody talks about. #### Article ContentMost Laravel WebSocket tutorials stop at "broadcast an event and listen on the frontend." That's the easy part. What they don't cover is what happens when you try to wire up private authenticated channels, connect Vue.js via Laravel Echo, manage multi-user group discussions, and layer on real-time desktop push notifications — all in a production CRM.
That's exactly what I built. Here's the full picture, including the parts that didn't work the first time.
The CRM needed three real-time features:
Live 1-to-1 chat between team members
Live group discussion rooms where multiple users collaborate simultaneously
Desktop push notifications — browser-level alerts when a new message arrives, even if the user isn't on the chat screen
All of this was built on Laravel Reverb — Laravel's official self-hosted WebSocket server, introduced in Laravel 11 — with Vue.js + Laravel Echo on the frontend.
bash
composer require laravel/reverb

php artisan reverb:install
The install command publishes the Reverb config and adds the necessary environment variables to your .env:
env
BROADCAST_CONNECTION=reverb

REVERB_APP_ID=your-app-id
REVERB_APP_KEY=your-app-key
REVERB_APP_SECRET=your-app-secret
REVERB_HOST=0.0.0.0
REVERB_PORT=8080
REVERB_SCHEME=http

VITE_REVERB_APP_KEY="${REVERB_APP_KEY}"
VITE_REVERB_HOST="${REVERB_HOST}"
VITE_REVERB_PORT="${REVERB_PORT}"
VITE_REVERB_SCHEME="${REVERB_SCHEME}"
The VITE_ prefixed variables are what Vue.js reads on the frontend via import.meta.env. This is important — without these, Echo on the frontend has no idea where to connect.
Start the Reverb server:
bash
php artisan reverb:startIn production (on VPS/EC2), you don't run this manually — Supervisor manages it. More on that later.
This was the first real challenge. After installing Echo and Reverb, the frontend simply wasn't connecting. No errors, no events, just silence.
The issue came down to three things that all had to be exactly right simultaneously:
Install the frontend dependencies:
bash
npm install --save-dev laravel-echo pusher-jspusher-js is required even though we're not using Pusher — Reverb uses the same protocol, and Echo uses the Pusher JS client under the hood.
Bootstrap Echo in resources/js/bootstrap.js:
javascript
import Echo from 'laravel-echo';
import Pusher from 'pusher-js';

window.Pusher = Pusher;

window.Echo = new Echo({
    broadcaster: 'reverb',
    key: import.meta.env.VITE_REVERB_APP_KEY,
    wsHost: import.meta.env.VITE_REVERB_HOST,
    wsPort: import.meta.env.VITE_REVERB_PORT,
    wssPort: import.meta.env.VITE_REVERB_PORT,
    forceTLS: import.meta.env.VITE_REVERB_SCHEME === 'https',
    enabledTransports: ['ws', 'wss'],
});
The gotcha that cost me the most time: wsHost must match exactly what your browser can reach. In local development, this is typically localhost. On a VPS, it needs to be your server's IP or domain — not 0.0.0.0 (that's what Reverb binds to server-side, not what the browser connects to). The moment I separated "what Reverb listens on" from "what the browser connects to" in my mental model, the connection issues resolved.
Also make sure bootstrap.js is imported in your main app.js:
javascript
import './bootstrap';Obvious in hindsight, easy to miss when setting up a new project.
Public channels are easy — anyone can listen. The CRM needed private channels so only the two participants in a conversation could receive each other's messages. This is where authentication comes in, and where most tutorials leave you hanging.
Define the channel in routes/channels.php:
php
// Private channel for 1-to-1 chat
Broadcast::channel('chat.{conversationId}', function ($user, $conversationId) {
    // Only allow users who are participants in this conversation
    return Conversation::where('id', $conversationId)
        ->whereHas('participants', function ($query) use ($user) {
            $query->where('user_id', $user->id);
        })
        ->exists();
});

// Private channel for group discussions
Broadcast::channel('group.{groupId}', function ($user, $groupId) {
    return GroupMember::where('group_id', $groupId)
        ->where('user_id', $user->id)
        ->exists();
});
The callback returns true if the user is authorized, false (or nothing) if not. Laravel uses this to respond to Echo's authentication handshake.
Set up the broadcast auth route. This is the part most tutorials skim. When Echo tries to subscribe to a private channel, it first makes an HTTP POST to /broadcasting/auth to verify the user is allowed. This route must be reachable and properly protected:
php
// routes/api.php — if your app uses API auth (Sanctum)
Route::post('/broadcasting/auth', function (Request $request) {
    return Broadcast::auth($request);
})->middleware('auth:sanctum');
If you're using session-based auth (web middleware), the default route in routes/web.php handles this automatically. But in a Vue.js SPA using Sanctum tokens, you need to tell Echo to send the auth token with the handshake:
javascript
window.Echo = new Echo({
    broadcaster: 'reverb',
    key: import.meta.env.VITE_REVERB_APP_KEY,
    wsHost: import.meta.env.VITE_REVERB_HOST,
    wsPort: import.meta.env.VITE_REVERB_PORT,
    forceTLS: false,
    enabledTransports: ['ws', 'wss'],
    authEndpoint: '/broadcasting/auth',
    auth: {
        headers: {
            Authorization: `Bearer ${localStorage.getItem('auth_token')}`,
            Accept: 'application/json',
        },
    },
});
Without the auth headers, the /broadcasting/auth request goes out without credentials, Laravel rejects it as unauthenticated, and Echo silently fails to subscribe to the private channel. This was the root cause of our private channel connection issues.
With channels authorized, broadcasting a message is straightforward. First, create the event:
php
// app/Events/MessageSent.php
class MessageSent implements ShouldBroadcast
{
    use Dispatchable, InteractsWithSockets, SerializesModels;

    public function __construct(
        public Message $message,
        public int $conversationId
    ) {}

    public function broadcastOn(): array
    {
        return [
            new PrivateChannel("chat.{$this->conversationId}"),
        ];
    }

    public function broadcastWith(): array
    {
        return [
            'id'         => $this->message->id,
            'body'       => $this->message->body,
            'sender_id'  => $this->message->sender_id,
            'sender'     => $this->message->sender->name,
            'created_at' => $this->message->created_at->toISOString(),
        ];
    }

    public function broadcastAs(): string
    {
        return 'message.sent';
    }
}
Fire it from the message controller:
php
public function send(Request $request, Conversation $conversation)
{
    $message = $conversation->messages()->create([
        'sender_id' => auth()->id(),
        'body'      => $request->input('body'),
    ]);

    broadcast(new MessageSent($message, $conversation->id))->toOthers();

    return response()->json($message->load('sender'));
}
->toOthers() is important — it excludes the sender from receiving the broadcast. Without it, the sender sees their own message appear twice (once from the API response, once from the WebSocket).
Listen in Vue.js:
javascript
// In your chat component
onMounted(() => {
    window.Echo.private(`chat.${conversationId}`)
        .listen('.message.sent', (e) => {
            messages.value.push(e);
            scrollToBottom();
        });
});

onUnmounted(() => {
    window.Echo.leave(`chat.${conversationId}`);
});
Note the dot prefix in .message.sent — this tells Echo the event name is exactly message.sent (from broadcastAs()), not the fully qualified class name.
Always leave channels in onUnmounted. Failing to do this leaves subscriptions open and can cause duplicate message listeners when the component remounts.
For the CRM's group discussion rooms, we needed to know who is currently online in the room — not just receive messages. This is where presence channels come in. They're like private channels but also broadcast a list of currently subscribed members.
php
// routes/channels.php
Broadcast::channel('group.{groupId}', function ($user, $groupId) {
    if (GroupMember::where('group_id', $groupId)->where('user_id', $user->id)->exists()) {
        return ['id' => $user->id, 'name' => $user->name, 'avatar' => $user->avatar_url];
    }
    return false;
});
When you return an array instead of true, that data becomes the member's presence info — visible to everyone in the channel.
javascript
// Vue.js — presence channel
window.Echo.join(`group.${groupId}`)
    .here((members) => {
        // Called immediately with all currently online members
        onlineMembers.value = members;
    })
    .joining((member) => {
        // Called when someone joins
        onlineMembers.value.push(member);
    })
    .leaving((member) => {
        // Called when someone leaves
        onlineMembers.value = onlineMembers.value.filter(m => m.id !== member.id);
    })
    .listen('.message.sent', (e) => {
        groupMessages.value.push(e);
    });
This gives you a live "who's online" indicator with zero extra API calls — it's all driven by WebSocket connection state.
This was the most interesting piece to build. When a new message arrives and the user isn't on the chat screen, we wanted a browser-level desktop notification — the kind that appears in the OS notification tray even when the browser is in the background.
This uses the browser's native Notifications API combined with our WebSocket events.
First, request permission on app load:
javascript
// In your main App.vue or layout component
onMounted(async () => {
    if ('Notification' in window && Notification.permission === 'default') {
        await Notification.requestPermission();
    }
});
Listen on a private notification channel per user:
php
// app/Events/NewMessageNotification.php
class NewMessageNotification implements ShouldBroadcast
{
    public function __construct(
        public User $recipient,
        public Message $message
    ) {}

    public function broadcastOn(): array
    {
        return [new PrivateChannel("notifications.{$this->recipient->id}")];
    }

    public function broadcastWith(): array
    {
        return [
            'title'   => "New message from {$this->message->sender->name}",
            'body'    => Str::limit($this->message->body, 60),
            'chat_id' => $this->message->conversation_id,
        ];
    }

    public function broadcastAs(): string
    {
        return 'new.message';
    }
}
php
// routes/channels.php
Broadcast::channel('notifications.{userId}', function ($user, $userId) {
    return (int) $user->id === (int) $userId;
});
Vue.js — subscribe and show desktop notification:
javascript
// Subscribe to the authenticated user's personal notification channel
const userId = authStore.user.id;

window.Echo.private(`notifications.${userId}`)
    .listen('.new.message', (e) => {
        // Show in-app notification badge
        unreadCount.value++;

        // Show desktop push notification if user is not on the chat screen
        if (document.hidden && Notification.permission === 'granted') {
            const notification = new Notification(e.title, {
                body: e.body,
                icon: '/icon-192.png',
            });

            // Click on notification navigates to the conversation
            notification.onclick = () => {
                window.focus();
                router.push(`/chat/${e.chat_id}`);
                notification.close();
            };
        }
    });
document.hidden checks whether the tab is currently in the background. If the user is actively on the chat screen, we skip the desktop notification and just update the UI directly — no one wants a pop-up for a message they can already see.
On the VPS, Reverb needs to stay running permanently. Supervisor handles this alongside the queue worker:
ini
[program:reverb]
command=php /var/www/artisan reverb:start --host=0.0.0.0 --port=8080
autostart=true
autorestart=true
redirect_stderr=true
stdout_logfile=/var/log/supervisor/reverb.log
stopwaitsecs=60
If you're running Reverb behind Nginx (recommended for SSL termination), proxy WebSocket connections through:
nginx
location /app {
    proxy_pass http://127.0.0.1:8080;
    proxy_http_version 1.1;
    proxy_set_header Upgrade $http_upgrade;
    proxy_set_header Connection "Upgrade";
    proxy_set_header Host $host;
    proxy_cache_bypass $http_upgrade;
}
The Upgrade and Connection headers are what tell Nginx to treat this as a WebSocket connection rather than a standard HTTP request. Without them, the WebSocket handshake fails.
Looking back, most of the friction came from three things:
The mental model mismatch. WebSockets feel different from HTTP. With HTTP, you make a request and get a response. With WebSockets, you open a persistent connection and events flow both ways asynchronously. Until that clicks, debugging feels like shooting in the dark.
Auth is a two-step process. The WebSocket connection itself is unauthenticated. Authentication happens via a separate HTTP POST to /broadcasting/auth. If that POST fails — wrong middleware, missing token, wrong endpoint — your private channels silently don't work. Every private channel issue I hit traced back to this handshake.
Frontend config has zero tolerance for mismatch. The wsHost, wsPort, VITE_ env variables, and Nginx proxy all have to be perfectly aligned. One wrong value and the connection fails with a vague error. I now always verify the WebSocket connection in the browser's Network tab (filter by WS) before debugging anything else.
Reverb uses the Pusher protocol — always install pusher-js on the frontend even if you're self-hosting.
wsHost ≠ Reverb's bind address. Reverb binds to 0.0.0.0 server-side; the browser connects to your domain or IP.
Private channel auth requires credentials on the handshake request. Pass your Sanctum token in Echo's auth.headers for SPA setups.
Use .toOthers() when broadcasting to avoid duplicate messages for the sender.
Always leave channels in onUnmounted to prevent duplicate listeners on remount.
Desktop notifications + document.hidden is a clean combination for notifying users who are in other tabs without spamming active users.
Supervisor is the right way to keep Reverb alive in production — not nohup, not screen, not a cron job.
Built something interesting with Reverb? Hit a specific issue with private channels or Vue.js integration? Drop a comment — these are the kind of problems worth discussing.
--- ### Article: Containerizing a Laravel App with Docker and Nginx: What I Learned Doing It in Production - **URL**: https://sudhirrajai.com/blog/containerizing-a-laravel-app-with-docker-and-nginx-what-i-learned-doing-it-in-production - **Date**: 2026-06-28 - **Excerpt**: A practical guide to containerizing a Laravel app with Docker and Nginx — based on real production experience. Covers php-fpm, environment parity, Supervisor, and zero environment-related bugs. #### Article ContentOne of the most frustrating things in web development is when something works perfectly on your machine but breaks on staging. Different PHP versions, missing extensions, Nginx configs that don't match — environment bugs waste hours and erode trust in your deployment process.
At Sapphire Software Solutions, I containerized our Laravel application with Docker and Nginx. The goal wasn't just to "use Docker" — it was to make our local, staging, and production environments identical, so that if it works locally, it works everywhere. Here's exactly how I did it and what I learned along the way.
Before jumping into the setup, it's worth being clear on what problem Docker actually solves here.
Without Docker, every developer on the team has their own PHP version, their own Nginx config, their own MySQL setup. One person has PHP 8.1, another has 8.2. One has short_open_tag enabled, another doesn't. The app works for one and silently misbehaves for the other.
With Docker, your entire environment — PHP version, extensions, Nginx config, MySQL version, queue worker — is defined in code. Everyone runs the same stack. Staging runs the same stack. Production runs the same stack. Environment-related bugs go from "frequent" to "nearly zero."
Here's what we're containerizing:
php-fpm — runs the Laravel application
Nginx — serves as the web server, proxies requests to php-fpm
MySQL — database
Redis — cache and queue driver
Supervisor (inside the php-fpm container) — manages the Laravel queue worker
project-root/
├── docker/
│   ├── nginx/
│   │   └── default.conf
│   ├── php/
│   │   ├── Dockerfile
│   │   └── supervisord.conf
├── docker-compose.yml
├── .env
└── (Laravel app files)
Keeping all Docker-related files in a docker/ directory keeps the project root clean and makes it obvious what's application code vs infrastructure config.
This is the most important piece — it defines the environment your Laravel app actually runs in.
dockerfile
# docker/php/Dockerfile
FROM php:8.2-fpm

# Install system dependencies
RUN apt-get update && apt-get install -y \
    git \
    curl \
    libpng-dev \
    libonig-dev \
    libxml2-dev \
    libzip-dev \
    zip \
    unzip \
    supervisor \
    && apt-get clean \
    && rm -rf /var/lib/apt/lists/*

# Install PHP extensions Laravel needs
RUN docker-php-ext-install \
    pdo_mysql \
    mbstring \
    exif \
    pcntl \
    bcmath \
    gd \
    zip

# Install Redis extension
RUN pecl install redis && docker-php-ext-enable redis

# Install Composer
COPY --from=composer:latest /usr/bin/composer /usr/bin/composer

# Set working directory
WORKDIR /var/www

# Copy application files
COPY . .

# Install PHP dependencies
RUN composer install --optimize-autoloader --no-dev

# Copy Supervisor config
COPY docker/php/supervisord.conf /etc/supervisor/conf.d/supervisord.conf

# Set correct permissions for Laravel storage and cache
RUN chown -R www-data:www-data /var/www/storage /var/www/bootstrap/cache \
    && chmod -R 775 /var/www/storage /var/www/bootstrap/cache

EXPOSE 9000

CMD ["/usr/bin/supervisord", "-c", "/etc/supervisor/conf.d/supervisord.conf"]
A few things worth noting:
We use php:8.2-fpm specifically — not php:latest. Pinning the version means no surprise upgrades breaking your app.
--optimize-autoloader --no-dev in the Composer install is important for production — it generates a classmap instead of scanning directories, which is significantly faster.
We start with supervisord as the container's main process instead of php-fpm directly. This lets Supervisor manage both php-fpm and the queue worker as child processes inside a single container.
Running the queue worker inside the same container as php-fpm keeps things simple without needing a separate container just for workers.
ini
; docker/php/supervisord.conf
[supervisord]
nodaemon=true
logfile=/var/log/supervisor/supervisord.log
pidfile=/var/run/supervisord.pid

[program:php-fpm]
command=php-fpm
autostart=true
autorestart=true
stderr_logfile=/var/log/supervisor/php-fpm.err.log
stdout_logfile=/var/log/supervisor/php-fpm.out.log

[program:laravel-worker]
process_name=%(program_name)s_%(process_num)02d
command=php /var/www/artisan queue:work redis --sleep=3 --tries=3 --max-time=3600
autostart=true
autorestart=true
numprocs=2
redirect_stderr=true
stdout_logfile=/var/log/supervisor/worker.log
stopwaitsecs=3600
nodaemon=true is critical — without it, Supervisor daemonizes itself (runs in the background), Docker sees no foreground process, and the container immediately exits.
numprocs=2 spins up two queue workers. Adjust this based on your workload — for most apps, 2–4 workers is a solid starting point.
Nginx handles incoming HTTP requests and proxies PHP requests to the php-fpm container over FastCGI:
nginx
# docker/nginx/default.conf
server {
    listen 80;
    server_name _;
    root /var/www/public;
    index index.php index.html;

    # Handle all requests through Laravel's front controller
    location / {
        try_files $uri $uri/ /index.php?$query_string;
    }

    # Pass PHP requests to php-fpm
    location ~ \.php$ {
        fastcgi_pass php:9000;
        fastcgi_index index.php;
        fastcgi_param SCRIPT_FILENAME $realpath_root$fastcgi_script_name;
        include fastcgi_params;
        fastcgi_read_timeout 300;
    }

    # Deny access to hidden files
    location ~ /\.(?!well-known).* {
        deny all;
    }

    # Cache static assets
    location ~* \.(jpg|jpeg|png|gif|ico|css|js|woff2)$ {
        expires 1y;
        add_header Cache-Control "public, immutable";
    }

    client_max_body_size 200M;
    error_log /var/log/nginx/error.log;
    access_log /var/log/nginx/access.log;
}
The fastcgi_pass php:9000 line is where Docker networking matters — php here refers to the service name defined in docker-compose.yml, not a hostname. Docker's internal DNS resolves service names automatically within a network.
client_max_body_size 200M is intentional — this matches the media upload requirements from the C2C project.
yaml
# docker-compose.yml
version: '3.8'

services:
  php:
    build:
      context: .
      dockerfile: docker/php/Dockerfile
    container_name: laravel_php
    restart: unless-stopped
    volumes:
      - .:/var/www
      - ./storage:/var/www/storage
    environment:
      - APP_ENV=${APP_ENV}
      - DB_HOST=mysql
      - DB_PORT=3306
      - DB_DATABASE=${DB_DATABASE}
      - DB_USERNAME=${DB_USERNAME}
      - DB_PASSWORD=${DB_PASSWORD}
      - REDIS_HOST=redis
      - CACHE_DRIVER=redis
      - QUEUE_CONNECTION=redis
    depends_on:
      - mysql
      - redis
    networks:
      - laravel_network

  nginx:
    image: nginx:alpine
    container_name: laravel_nginx
    restart: unless-stopped
    ports:
      - "80:80"
      - "443:443"
    volumes:
      - .:/var/www
      - ./docker/nginx/default.conf:/etc/nginx/conf.d/default.conf
    depends_on:
      - php
    networks:
      - laravel_network

  mysql:
    image: mysql:8.0
    container_name: laravel_mysql
    restart: unless-stopped
    environment:
      MYSQL_DATABASE: ${DB_DATABASE}
      MYSQL_USER: ${DB_USERNAME}
      MYSQL_PASSWORD: ${DB_PASSWORD}
      MYSQL_ROOT_PASSWORD: ${DB_ROOT_PASSWORD}
    volumes:
      - mysql_data:/var/lib/mysql
    networks:
      - laravel_network

  redis:
    image: redis:alpine
    container_name: laravel_redis
    restart: unless-stopped
    networks:
      - laravel_network

networks:
  laravel_network:
    driver: bridge

volumes:
  mysql_data:
    driver: local
A few design decisions here worth explaining:
Named volumes for MySQL data (mysql_data). If you use a bind mount instead, file permission issues on Linux hosts can corrupt the MySQL data directory. Named volumes let Docker manage this cleanly.
restart: unless-stopped on all services means containers come back up automatically after a server reboot — essential for production VPS deployments.
DB_HOST=mysql and REDIS_HOST=redis — these point to the service names, not localhost. Inside a Docker network, services talk to each other by name. This is the most common gotcha when people first containerize a Laravel app: they leave DB_HOST=127.0.0.1 in their .env and wonder why the app can't connect to the database.
bash
# First time setup
docker-compose up -d --build

# Run Laravel setup commands
docker-compose exec php php artisan key:generate
docker-compose exec php php artisan migrate --force
docker-compose exec php php artisan config:cache
docker-compose exec php php artisan route:cache
docker-compose exec php php artisan view:cache

# Check all containers are running
docker-compose ps

# View logs
docker-compose logs -f php
docker-compose logs -f nginx
The three cache commands at the end (config:cache, route:cache, view:cache) are important in production — they pre-compile config, routes, and Blade templates into single files, which is significantly faster than parsing them on every request.
Before containerizing, our team would regularly hit issues like:
"Works on my machine" after a code review — turns out the reviewer had a different PHP extension installed
Staging behaving differently from local because the server's Nginx config had a subtle difference
Queue workers dying silently on the VPS with no clear restart mechanism
After containerizing:
Every developer runs docker-compose up and gets an identical environment
Staging and production use the same Docker image built from the same Dockerfile
Supervisor restarts the queue worker automatically if it crashes
Nginx config is version-controlled alongside the application code — no more "what's the Nginx config on the server again?"
The environment-related bug reports from the team dropped to near zero within the first sprint.
1. Forgetting to rebuild after Dockerfile changes. If you change the Dockerfile, docker-compose up alone won't pick up the changes. Always use docker-compose up -d --build after modifying Dockerfiles.
2. Storage permissions. Laravel writes to storage/ and bootstrap/cache/. If these aren't owned by www-data inside the container, you'll get permission errors. The chown in the Dockerfile handles this, but if you're using bind mounts in development, you may need to run docker-compose exec php chown -R www-data:www-data storage bootstrap/cache after mounting.
3. DB_HOST=127.0.0.1 in .env. Change it to the service name (mysql). Services in the same Docker network talk to each other by service name, not localhost.
4. APP_KEY not set. Always run php artisan key:generate after first boot. Without it, encryption, sessions, and cookies won't work.
ProblemBeforeAfterEnvironment setup for new developer1–2 hours of manual setupdocker-compose up — done"Works on my machine" bugsRegularNear zeroQueue worker crashesSilent, required manual restartSupervisor auto-restartsNginx config drift between environmentsCommonImpossible — config is in version controlDeployment consistencyManual, error-proneReproducible every time
Pin your PHP version in the Dockerfile — never use latest in production.
Use service names, not localhost, for inter-container communication in Docker networks.
Run Supervisor as the main container process to manage both php-fpm and queue workers without needing a separate container.
Cache config, routes, and views after deployment — it's free performance.
Named volumes for databases — avoid bind mounts for MySQL data on Linux hosts.
The real value of Docker isn't the containers themselves — it's environment parity. If your dev and prod environments run the same image, a whole class of bugs simply disappears.
Setting up Docker for your Laravel project for the first time? Feel free to reach out — happy to help you work through environment-specific quirks.
--- ### Article: How I Fixed a 40% Media Upload Failure Rate on a C2C Platform Using UUID-Based Pre-Upload in Laravel - **URL**: https://sudhirrajai.com/blog/how-i-fixed-a-40-media-upload-failure-rate-on-a-c2c-platform-using-uuid-based-pre-upload-in-laravel - **Date**: 2026-06-27 - **Excerpt**: Learn how I solved large media upload failures on a C2C marketplace by separating the upload flow from the form submission — using UUID-tagged pre-uploads and deferred linking in Laravel. #### Article ContentI was working on a C2C marketplace — think OLX-style, where users list products with photos and videos. The Flutter app had a single "Post a Product" flow: fill in the details, attach your media, hit Save. One API call. Simple enough.
Except it wasn't working. Media files were hitting 200MB, and the failure rate on that endpoint was around 40%. Users would spend time filling out a product form, attach their videos, tap Save — and get an error. The whole thing failed together.
The problem wasn't the uploads themselves. It was the architecture.
The original endpoint received everything in one shot — product title, description, price, category, and all media files bundled into a single multipart/form-data request:
POST /api/product/create
  - title
  - description
  - price
  - category_id
  - media[] (200MB of images/videos)
On paper this looks fine. In practice, here's what happens on a mobile device:
The user spends 2–3 minutes filling out the form
They attach 3–4 videos totalling ~200MB
Flutter sends one giant request — form data + media together
The server times out, the connection drops, or the PHP upload limit is hit
Everything fails. The form data is lost too. The user starts over.
Two completely unrelated problems — "did the form data save?" and "did the media upload?" — were coupled into one failure point. Fix one, both break. Fix neither, users leave.
Before settling on the UUID pre-upload approach, I looked at two other solutions that seem reasonable on the surface but fall apart under real usage.
The idea here is to accept the full request (form data + media), save the form data immediately, and push the media processing to a background queue job. The product gets created, and the media gets attached later.
php
// Dispatch a job to handle media after saving the product
public function store(Request $request)
{
    $product = Product::create($request->only(['title', 'description', 'price']));
    ProcessProductMedia::dispatch($product->id, $request->file('media'));
    return response()->json(['message' => 'Product saved, media processing...']);
}
The problems:
Delayed media display. The product listing goes live on the platform immediately, but with no photos or videos. Other users browsing the marketplace see an empty listing. On a C2C platform where media is the entire selling point, this is a terrible experience.
Silent failures are hard to recover from. If the queue job fails — worker crash, S3 timeout, memory limit — the product exists in the database with no media permanently attached. You need extra logic to detect and retry failed jobs, notify the user, and handle partial completions. The complexity compounds fast.
The user has no idea what happened. They tapped Save and got a success response. But if they open their listing 10 seconds later and it has no images, is that a bug? A delay? They don't know. Support tickets follow.
A variation of the above: store uploaded files in a temp folder and have a cron job sweep them up periodically, attach them to their products, and push them to S3.
The problems:
Delay is now guaranteed and predictable — predictably bad. If your cron runs every 5 minutes, every single user waits up to 5 minutes for their listing to show media. At scale, that's not a bug, it's a feature users will hate by design.
Media can get silently lost. If a file is in the temp folder and the cron job errors mid-run, that file may never get processed. There's no built-in retry, no user notification, no audit trail. The media just... disappears.
Harder to debug. When a user says "my photos didn't upload," you're now debugging a cron execution log rather than a simple API request. The failure surface is wide and asynchronous.
Both alternatives share the same fundamental flaw: they separate the upload from the product save, but in a way that's invisible and uncontrollable to the user. Media goes into a black box and hopefully comes out the other side.
The UUID pre-upload approach is different because the user is in control the entire time. They can see each file upload succeed or fail in real time. By the time they tap Save, all media is already on S3 and confirmed. The final API call is lightweight — just form data and a list of UUIDs. There's no async magic, no delayed processing, no hidden failure modes.
It's immediate, transparent, and reliable.
The insight was simple: media upload and form submission are two different jobs. They shouldn't happen in the same request.
Here's the flow we designed, split clearly between what the Flutter app owns and what Laravel owns:
Flutter's responsibility (client-side state):
User selects one or more media files on the "Post Product" screen
Flutter generates a UUID locally for each selected file — before any network call
Each file is uploaded to the pre-upload API with its UUID attached
Flutter tracks the UUID ↔ file mapping internally
If the user removes a file or replaces it, Flutter simply drops that UUID from its list — no delete API needed, the app just stops tracking it
User fills in the product details form in parallel
Laravel's responsibility (server-side):
Pre-upload API receives each file along with its app-generated UUID, stores it on S3 keyed by that UUID
On final form submit, receives the product details + only the UUIDs the user actually kept
Matches those UUIDs to stored files, links the matching ones to the new product via a pivot table
Dispatches a background queue job to delete any uploaded files whose UUIDs were NOT in the final list — storage cleanup without blocking the response
The key insight: the app owns session state, Laravel owns storage. Flutter knows which files the user kept or discarded; Laravel doesn't need to. Laravel just receives the final confirmed list and acts on it.
When the user selects a file, Flutter generates a UUID for it on the client side and immediately uploads both the file and its UUID to this endpoint:
php
// routes/api.php
Route::post('/media/pre-upload', [MediaController::class, 'preUpload'])->middleware('auth:sanctum');
php
// app/Http/Controllers/MediaController.php
public function preUpload(Request $request)
{
    $request->validate([
        'uuid' => 'required|uuid',
        'file' => 'required|file|mimes:jpg,jpeg,png,mp4,mov|max:204800', // 200MB
    ]);

    $uuid      = $request->input('uuid'); // UUID generated by the Flutter app
    $file      = $request->file('file');
    $extension = $file->getClientOriginalExtension();

    // Store the file on S3 keyed by the app-provided UUID
    $path = $file->storeAs("pre-uploads/{$uuid}", "media.{$extension}", 's3');

    // Track it in DB so we can find it during the save step
    PendingMedia::create([
        'uuid'      => $uuid,
        'user_id'   => auth()->id(),
        'path'      => $path,
        'mime_type' => $file->getMimeType(),
    ]);

    return response()->json(['success' => true]);
}
Notice what's different here: Laravel doesn't generate or return a UUID. The UUID was already created by Flutter before this request was even made. Laravel just stores the file using that UUID as the key and acknowledges receipt. Flutter already knows the UUID — it generated it — so there's nothing to return except a success confirmation.
This also means there's no need for a separate "delete media" API. If the user removes a photo or swaps it for another, Flutter just drops that UUID from its internal list. The file is still on S3, but it will be cleaned up after the final save — more on that in Step 3.
php
// database/migrations/create_pending_media_table.php
Schema::create('pending_media', function (Blueprint $table) {
    $table->id();
    $table->uuid('uuid')->unique();
    $table->foreignId('user_id')->constrained()->cascadeOnDelete();
    $table->string('path');
    $table->string('mime_type');
    $table->timestamps();
});
This table is a temporary holding area — a record for every file that's been uploaded but not yet confirmed as part of a product. After the product save, any row in here that wasn't in the final UUID list is stale and gets cleaned up by a queue job.
When the user taps Save, Flutter sends the product details along with only the UUIDs it still has in its active list — meaning files the user didn't remove or replace:
json
POST /api/product/save
{
  "title": "iPhone 13 Pro Max",
  "description": "Excellent condition, 1 year old",
  "price": 65000,
  "category_id": 4,
  "media_uuids": [
    "a1b2c3d4-...",
    "e5f6g7h8-..."
  ]
}
Notice that if the user uploaded 4 files but removed 2 during form filling, only 2 UUIDs arrive here. Flutter silently dropped the others from its list. Laravel doesn't know those other 2 existed — it just works with what it receives.
php
public function save(Request $request)
{
    $request->validate([
        'title'         => 'required|string|max:255',
        'description'   => 'required|string',
        'price'         => 'required|numeric|min:0',
        'category_id'   => 'required|exists:categories,id',
        'media_uuids'   => 'required|array|min:1|max:10',
        'media_uuids.*' => 'uuid',
    ]);

    $submittedUuids = $request->media_uuids;

    // Fetch all pending media uploaded by this user
    $allPendingMedia = PendingMedia::where('user_id', auth()->id())->get();

    // Split into: media the user kept vs media the user discarded
    $keptMedia      = $allPendingMedia->whereIn('uuid', $submittedUuids);
    $discardedMedia = $allPendingMedia->whereNotIn('uuid', $submittedUuids);

    // Verify all submitted UUIDs actually exist and belong to this user
    if ($keptMedia->count() !== count($submittedUuids)) {
        return response()->json([
            'message' => 'One or more media files are invalid. Please re-upload.'
        ], 422);
    }

    DB::transaction(function () use ($request, $keptMedia) {
        $product = Product::create([
            'user_id'     => auth()->id(),
            'title'       => $request->title,
            'description' => $request->description,
            'price'       => $request->price,
            'category_id' => $request->category_id,
        ]);

        // Link matching media to the product via pivot table
        foreach ($keptMedia as $media) {
            $product->media()->create([
                'path'      => $media->path,
                'mime_type' => $media->mime_type,
                'uuid'      => $media->uuid,
            ]);

            $media->delete(); // Remove from pending table
        }
    });

    // Fire-and-forget: clean up discarded media from S3 in the background
    // User is NOT waiting on this — the product is already saved above
    if ($discardedMedia->isNotEmpty()) {
        CleanDiscardedMedia::dispatch($discardedMedia->pluck('id')->toArray());
    }

    return response()->json(['message' => 'Product listed successfully.'], 201);
}
php
// app/Jobs/CleanDiscardedMedia.php
public function handle()
{
    $mediaRecords = PendingMedia::whereIn('id', $this->pendingMediaIds)->get();

    foreach ($mediaRecords as $media) {
        Storage::disk('s3')->deleteDirectory("pre-uploads/{$media->uuid}");
        $media->delete();
    }
}
This is where using a queue job is exactly right — and notice how different this is from the rejected "Option 1" above. In Option 1, the queue job was responsible for the critical path (getting media onto S3 and attached to the product). Here, the queue job is only responsible for cleanup of already-discarded files. The user is not waiting on it, the product is fully saved before it runs, and if it fails, the only consequence is a few stale files on S3 — not broken data. Low stakes, right tool.
Two additional things worth noting:
UUID ownership check: verifying all submitted UUIDs belong to the authenticated user prevents one user from referencing another user's uploaded media in their product.
DB transaction: the product creation and media linking are wrapped together — if anything fails mid-save, no partial records are left behind.
Beyond fixing the failure rate, this design gives you several things for free:
No delete media API needed. This is the elegant part — if the user removes or replaces a file, Flutter just drops its UUID. Laravel doesn't need to know mid-session. The cleanup only happens once at save time, via a queue job. One less API to build, one less failure surface.
Individual retry without losing form data. If one video fails to upload, Flutter retries just that file. The form the user has been filling in is completely unaffected — it lives on the client, not in the request.
Real per-file progress bars. Each file is its own independent upload request, so Flutter can show accurate per-file progress. Far better UX than a single spinner over a 200MB request.
Upload while typing. The user can start attaching files and fill the product details form simultaneously. By the time they tap Save, media is already on S3. The final submit is lightweight — just JSON, no files.
Queue job cleanup is low-risk here. The queue job only deletes discarded files — it's not in the critical path. If it fails, a few stale files sit on S3. The product and its confirmed media are already saved correctly. This is the right place for async.
MetricBeforeAfterUpload + form failure rate~40%<3%Failed saves losing form dataEvery timeNever (form and media are independent)UX: upload feedbackSingle spinnerPer-file progressFailed video = retry everythingYesNo — retry that file only
Let the client own session state. The Flutter app knows which files the user kept or discarded — it doesn't make sense for Laravel to track that. Split responsibilities cleanly: app manages state, backend manages storage.
UUIDs generated on the client are fine as long as you validate ownership server-side. Never trust that a UUID belongs to the requesting user without checking.
No delete API is a feature, not a gap. If your architecture requires a delete-mid-session API, that's a sign the server is owning state it shouldn't be. Push that responsibility to the client.
Queue jobs belong on the non-critical path. Cleanup of discarded files is the right use of a queue job — fire it after the product is saved, let it run in the background, and the worst-case failure is a few stale S3 files, not broken product data.
The final save API should be lightweight. If your save endpoint is receiving large files, something upstream went wrong. By the time Save is called, all media should already be on the server.
Building a listing or marketplace app in Laravel? This pattern comes up constantly — happy to discuss your specific use case in the comments or via the contact page.
--- ### Article: Chunked File Uploads in Laravel: How I Fixed a 40% Failure Rate - **URL**: https://sudhirrajai.com/blog/chunked-file-uploads-in-laravel-how-i-fixed-a-40-failure-rate - **Date**: 2026-06-25 - **Excerpt**: Discover how switching from direct cloud storage uploads to chunked transfers in Laravel eliminated a 40% failure rate and cut load times dramatically — with real code examples. #### Article ContentFile uploads seem simple until they're not. You wire up a form, point it at an S3 bucket, and everything works fine — until someone tries to upload a 150MB video on a spotty connection and gets a white screen with a timeout error.
That was the situation I walked into. A media upload pipeline with a 40% failure rate. Users were losing files mid-upload, retrying manually, and sometimes giving up entirely. The root cause turned out to be surprisingly straightforward once I found it — and fixing it taught me a lot about how file uploads actually work under the hood.
The original implementation was doing what a lot of Laravel apps do by default — taking the uploaded file and pushing it straight to cloud storage in one shot:
php
// ❌ The original approach — fine for small files, brutal for large ones
public function upload(Request $request)
{
    $request->validate(['file' => 'required|file|max:102400']);

    $path = $request->file('file')->store('uploads', 's3');

    return response()->json(['path' => $path]);
}
This works perfectly for small files. But for anything large, you're relying on:
The client's connection staying stable for the entire upload duration
The PHP process staying alive long enough to receive and forward the file
The cloud storage request not timing out mid-transfer
Any one of these breaking means the entire upload fails. There's no resume, no retry, no partial progress — just a failed request and a frustrated user.
The idea behind chunked uploads is simple: instead of sending one giant file, the frontend splits it into small pieces (chunks) and sends them one at a time. The backend receives and stores each chunk, then assembles them into the final file once all pieces arrive.
This means:
A failed chunk only loses a few MB, not the whole upload
Uploads can be paused and resumed
Progress bars become accurate and meaningful
Server timeouts are no longer a concern
Here's how I implemented it end to end.
On the frontend (Vue.js in our case), the file is sliced using the native File.slice() API:
javascript
const CHUNK_SIZE = 5 * 1024 * 1024; // 5MB per chunk

async function uploadFile(file) {
  const totalChunks = Math.ceil(file.size / CHUNK_SIZE);
  const uploadId = crypto.randomUUID(); // unique ID for this upload session

  for (let index = 0; index < totalChunks; index++) {
    const start = index * CHUNK_SIZE;
    const end = Math.min(start + CHUNK_SIZE, file.size);
    const chunk = file.slice(start, end);

    const formData = new FormData();
    formData.append('chunk', chunk);
    formData.append('upload_id', uploadId);
    formData.append('chunk_index', index);
    formData.append('total_chunks', totalChunks);
    formData.append('filename', file.name);

    await axios.post('/api/upload/chunk', formData, {
      headers: { 'Content-Type': 'multipart/form-data' },
      onUploadProgress: (e) => {
        const overall = ((index + e.loaded / e.total) / totalChunks) * 100;
        progress.value = Math.round(overall);
      }
    });
  }
}
Each chunk carries enough metadata for the backend to know where it fits: the unique upload_id ties all chunks to the same file, and chunk_index tells the backend the order.
The backend receives each chunk, validates it, and writes it to temporary local storage:
php
// routes/api.php
Route::post('/upload/chunk', [UploadController::class, 'receiveChunk']);
Route::post('/upload/finalize', [UploadController::class, 'finalizeUpload']);
php
// app/Http/Controllers/UploadController.php
public function receiveChunk(Request $request)
{
    $request->validate([
        'chunk'        => 'required|file',
        'upload_id'    => 'required|string|max:64',
        'chunk_index'  => 'required|integer|min:0',
        'total_chunks' => 'required|integer|min:1',
        'filename'     => 'required|string|max:255',
    ]);

    $uploadId    = $request->input('upload_id');
    $chunkIndex  = $request->input('chunk_index');
    $totalChunks = (int) $request->input('total_chunks');

    // Store each chunk in a temp directory named by upload_id
    $chunkPath = storage_path("app/chunks/{$uploadId}");
    if (!file_exists($chunkPath)) {
        mkdir($chunkPath, 0755, true);
    }

    $request->file('chunk')->move($chunkPath, "chunk_{$chunkIndex}");

    // Check if all chunks have arrived
    $receivedChunks = count(glob("{$chunkPath}/chunk_*"));

    if ($receivedChunks === $totalChunks) {
        return $this->assembleAndStore($uploadId, $totalChunks, $request->input('filename'));
    }

    return response()->json([
        'status'   => 'chunk_received',
        'received' => $receivedChunks,
        'total'    => $totalChunks,
    ]);
}Once all chunks are received, they're assembled into the final file and pushed to S3:
php
private function assembleAndStore(string $uploadId, int $totalChunks, string $filename): JsonResponse
{
    $chunkPath   = storage_path("app/chunks/{$uploadId}");
    $extension   = pathinfo($filename, PATHINFO_EXTENSION);
    $finalName   = $uploadId . '.' . $extension;
    $finalPath   = storage_path("app/temp/{$finalName}");

    // Assemble chunks in order
    $output = fopen($finalPath, 'wb');
    for ($i = 0; $i < $totalChunks; $i++) {
        $chunkFile = "{$chunkPath}/chunk_{$i}";
        $chunk     = fopen($chunkFile, 'rb');
        stream_copy_to_stream($chunk, $output);
        fclose($chunk);
    }
    fclose($output);

    // Upload assembled file to S3
    $s3Path = Storage::disk('s3')->putFileAs(
        'uploads',
        new \Illuminate\Http\File($finalPath),
        $finalName
    );

    // Clean up temp files
    array_map('unlink', glob("{$chunkPath}/chunk_*"));
    rmdir($chunkPath);
    unlink($finalPath);

    return response()->json([
        'status' => 'complete',
        'path'   => $s3Path,
        'url'    => Storage::disk('s3')->url($s3Path),
    ]);
}
Using stream_copy_to_stream is important here — it reads and writes the file in small buffers rather than loading the entire assembled file into PHP memory at once.
One edge case to handle: users who start an upload and then close the browser. Those chunk directories sit on disk forever unless you clean them up.
A simple scheduled command handles this:
php
// app/Console/Commands/CleanAbandonedUploads.php
public function handle()
{
    $chunksDir = storage_path('app/chunks');
    $cutoff    = now()->subHours(2)->timestamp;

    foreach (glob("{$chunksDir}/*") as $dir) {
        if (is_dir($dir) && filemtime($dir) < $cutoff) {
            array_map('unlink', glob("{$dir}/chunk_*"));
            rmdir($dir);
        }
    }

    $this->info('Abandoned upload chunks cleaned.');
}
Register it in your scheduler:
php
// app/Console/Kernel.php
$schedule->command('uploads:clean')->hourly();After deploying chunked uploads:
MetricBeforeAfterUpload failure rate~40%<2%Large file load timeTimeout / failedConsistent, with progressUser retry complaintsFrequentNear zeroMax uploadable file size~20MB (practical limit)Unlimited (chunk-based)
The 40% failure rate dropped to under 2% — mostly edge cases like users genuinely losing internet mid-upload, which no implementation can fully prevent.
If you're dealing with very large files (500MB+), AWS S3 has its own native chunked upload protocol called Multipart Upload. Laravel's Flysystem adapter doesn't expose this directly, but you can use the AWS SDK:
php
use Aws\S3\S3Client;

$s3 = new S3Client([
    'version' => 'latest',
    'region'  => config('filesystems.disks.s3.region'),
]);

// Initiate multipart upload
$multipart = $s3->createMultipartUpload([
    'Bucket' => config('filesystems.disks.s3.bucket'),
    'Key'    => 'uploads/' . $finalName,
]);

// Upload each part (minimum 5MB per part except the last)
// ... then complete with $s3->completeMultipartUpload()
This moves the heavy lifting directly to S3's infrastructure and bypasses PHP entirely for the actual transfer — worth considering if you regularly handle very large media files.
Direct single-request uploads fail under real-world conditions — spotty connections, large files, and PHP timeouts combine to create high failure rates.
Chunking solves all three problems — smaller requests, automatic retry-ability, and accurate progress tracking.
Stream assembly, don't load into memory — use stream_copy_to_stream when reassembling chunks to keep memory usage flat.
Schedule a cleanup command — abandoned uploads will fill your disk if you don't.
For 500MB+ files, consider S3 Multipart Upload to bypass PHP entirely.
File upload reliability is one of those things users never notice when it works and absolutely rage about when it doesn't. Chunking is the right default for any file over a few MB.
Building something with media uploads in Laravel? Feel free to reach out — always happy to talk through implementation details.
--- ### Article: How I Cut Laravel API Response Times from 800ms to Under 400ms - **URL**: https://sudhirrajai.com/blog/how-i-cut-laravel-api-response-times-from-800ms-to-under-400ms - **Date**: 2026-06-25 - **Excerpt**: Learn practical techniques to cut Laravel API response times in half — including query profiling, eager loading, caching, and REST endpoint restructuring — from a developer who did it in production. #### Article ContentWhen I joined as a Laravel developer, one of the first things I noticed was slow API responses — some endpoints were taking anywhere from 500ms to 800ms. That's not just a number on a dashboard; it's users waiting, mobile clients timing out, and a frontend that feels sluggish no matter how well-optimized it is.
Over a few weeks of profiling and iterating, I brought those same endpoints consistently under 400ms. Here's exactly how I did it — no fluff, just the techniques that actually worked.
The biggest mistake developers make is guessing where the bottleneck is. I started by using Laravel Debugbar in local/staging and Laravel Telescope in a controlled production environment to understand what was actually happening on each slow request.
What I found surprised me: the slowest endpoints weren't doing complex logic — they were just making too many database queries because of missing eager loading.
Install Debugbar for local profiling:
bash
composer require barryvdh/laravel-debugbar --devOnce you can see the query count per request, slow APIs usually fall into one of three buckets:
N+1 query problems — fetching a list and then querying each item individually
Missing indexes on columns used in WHERE, ORDER BY, or JOIN clauses
Over-fetching — returning far more data than the frontend actually needs
This was the single biggest win. Consider a typical API endpoint that returns a list of orders with their customer and product details:
php
// ❌ BAD — triggers N+1 queries
$orders = Order::all();

foreach ($orders as $order) {
    echo $order->customer->name; // separate query for each order
    echo $order->product->title; // another separate query
}
For 50 orders, that's 101 queries. With eager loading:
php
// ✅ GOOD — 3 queries total, regardless of result count
$orders = Order::with(['customer', 'product'])->get();
Laravel's with() method batches the related queries, so you go from N+1 queries down to a fixed number. On endpoints returning large datasets, this alone can cut response time by 60–70%.
Nested relationships work the same way:
php
$orders = Order::with(['customer.address', 'product.category'])->get();Another common issue I found was endpoints pulling entire Eloquent models when only 2–3 fields were actually used in the response. Every extra column you fetch adds serialization overhead.
php
// ❌ Fetching everything
$users = User::with('profile')->get();

// ✅ Only fetch what the API response actually needs
$users = User::select('id', 'name', 'email')
             ->with(['profile:id,user_id,avatar_url'])
             ->get();
The select() constraint on eager loads (profile:id,user_id,avatar_url) is easy to miss but critical — without it, you're still fetching the full related model even when you only need one column.
After fixing N+1 issues, I ran EXPLAIN on the remaining slow queries directly in MySQL. Several were doing full table scans on columns that were frequently filtered or sorted.
sql
EXPLAIN SELECT * FROM orders WHERE status = 'pending' ORDER BY created_at DESC;If you see type: ALL in the output, you need an index. Adding one via a Laravel migration is straightforward:
php
Schema::table('orders', function (Blueprint $table) {
    $table->index(['status', 'created_at']);
});
Composite indexes (multiple columns) work best when your query filters on both columns together. After adding indexes to our most-hit tables, several queries dropped from ~120ms to under 10ms.
Some endpoints returned data that was computationally expensive but didn't change often — things like category trees, configuration data, or aggregated stats. For these, Laravel's cache layer is a simple, high-impact fix:
php
$categories = Cache::remember('product_categories', now()->addHours(6), function () {
    return Category::with('children')->active()->get();
});
This executes the query once, stores the result, and serves it from memory for the next 6 hours. For read-heavy endpoints, this can take response time from 300ms to under 5ms.
For data that changes based on user context, use a cache key that includes relevant identifiers:
php
$key = "user_dashboard_{$userId}";
$data = Cache::remember($key, now()->addMinutes(10), fn() => $this->buildDashboard($userId));Sometimes the issue isn't a single slow query — it's that one endpoint is doing too many things. I found a few endpoints that were aggregating data, sending emails, and logging analytics synchronously in a single request.
The fix: move non-essential work to queued jobs.
php
// ❌ Doing everything in the request cycle
public function store(Request $request)
{
    $order = Order::create($request->validated());
    Mail::to($order->customer)->send(new OrderConfirmation($order)); // blocks!
    Analytics::track($order); // also blocks!
    return response()->json($order);
}

// ✅ Dispatch async, respond immediately
public function store(Request $request)
{
    $order = Order::create($request->validated());
    SendOrderConfirmation::dispatch($order);
    TrackOrderAnalytics::dispatch($order);
    return response()->json($order);
}
The user gets a response the moment the order is saved. Everything else happens in the background via Laravel's queue worker.
After applying all of these techniques systematically:
TechniqueImpactEager loading (N+1 fix)~60% query count reductionSelect only needed columns~15% serialization speedupDatabase indexesSpecific queries: 120ms → <10msResponse cachingCached endpoints: ~5ms responseAsync queue for side effectsEliminated 100–200ms blocking work
Overall result: 500–800ms endpoints consistently under 400ms.
Profile before you optimize. Tools like Debugbar and Telescope show you exactly where time is being spent.
N+1 queries are the #1 culprit in most slow Laravel APIs. Fix them first.
Indexes are free performance. Run EXPLAIN on your slow queries — you'll often find a missing index.
Caching and queues are your best friends for endpoints that do heavy lifting.
Performance optimization isn't about clever tricks — it's about understanding what your application is actually doing and removing unnecessary work. Start with the profiler, fix the obvious issues, and measure again.
Have a specific bottleneck you're debugging? Drop a comment or reach out — always happy to talk through a tricky optimization.
--- ### Article: Building Nimbus: a self-hosted VPS control panel - **URL**: https://sudhirrajai.com/blog/building-nimbus-a-self-hosted-vps-control-panel - **Date**: 2026-05-15 - **Excerpt**: Lessons from designing a Laravel + Vue.js dashboard that manages Nginx, PHP versions, cron, databases and backups. #### Article ContentManaging a VPS has always felt like a tradeoff. You either pay for heavyweight panels like cPanel or Plesk — which cost more than the server itself — or you live in the terminal, manually configuring Nginx, SSL, databases, and cron jobs every time you spin up a project. Neither felt right to me.
So I built Nimbus.
Nimbus is a self-hosted, open-source VPS control panel built on Laravel and Vue.js. It's designed to be lightweight, developer-friendly, and genuinely pleasant to use. Think of it as the control panel I always wanted but never found.
I was deploying a Laravel side project on a fresh Ubuntu VPS. Setting up Nginx vhosts, provisioning an SSL cert, configuring MySQL users, and wiring up a Supervisor queue worker — all the things you do every single time — took the better part of an afternoon. And I had done it dozens of times before.
I wanted a panel that:
Felt modern, not like it was designed in 2008
Didn't lock me into a vendor or a paid tier just to do basic things
Was built with technologies I already know and can extend
Installed in one command and stayed out of my way
Existing open-source options were either unmaintained, clunky, or missing key features. So I started building.
Nimbus is built with Laravel 12 on the backend and Vue.js 3 on the frontend, bundled with Vite. The choice was deliberate — Laravel's ecosystem is mature, and Vue's reactivity makes building real-time dashboards feel natural.
The frontend is styled with a custom Material Design-inspired UI using SCSS, which makes up the largest chunk of the codebase (~30%). The shell scripting layer (~2.4%) handles the actual server operations — configuring Nginx, issuing Let's Encrypt certificates, and managing system services.
The core of Nimbus is a set of management modules, each one abstracting away a chunk of the sysadmin work I was doing manually:
Domain & Nginx Management — Create a domain, and Nimbus writes and activates the Nginx virtual host for you. No more hand-editing config files.
SSL Certificates — One-click Let's Encrypt provisioning with auto-renewal. Certificate status is visible right in the panel.
Database Management — Create MySQL/MariaDB databases and users, set permissions, and launch phpMyAdmin — all from the UI.
File Manager — A web-based file browser with upload, download, delete, and permission editing. Useful for quick edits without SSHing in.
Supervisor — Manage queue workers visually. Start, stop, restart, and tail logs for any process.
Cron Jobs — A visual scheduler with human-readable descriptions and quick presets. You can also trigger jobs manually for testing.
Email Server — Full Postfix + Dovecot setup with virtual mailboxes, plus Roundcube webmail integration.
Server Monitoring — Real-time CPU, RAM, disk, and network stats, plus a process list and system uptime.
PHP Configuration — Edit php.ini settings from the UI. Log viewer for Nginx, PHP, Laravel, and system logs.
One of my goals was to make the setup experience as frictionless as possible. The entire install is a single command:
bash
curl -sSL https://raw.githubusercontent.com/sudhirrajai/Nimbus/main/install.sh | sudo bashThe script provisions everything the panel needs — Nginx, PHP 8.2, MariaDB, Node.js 20, Composer, and Supervisor — on a fresh Ubuntu 22.04 or Debian 11 server with at least 1GB of RAM.
After that, you hit http://YOUR_IP:2095, create your admin account, and you're in.
Building a control panel is a different kind of challenge from building a typical web app. Every feature is a thin UI layer on top of real system operations — and mistakes have real consequences. Getting SSL issuance wrong means a broken site. Writing a bad Nginx config can take down every domain on the server.
A few things I picked up along the way:
Shell scripts are production code. The install script and all the system-level operations need to be idempotent, handle errors explicitly, and never silently fail. I spent more time on the shell layer than I expected.
Security has to be the default, not an afterthought. Authentication guards on every route, CSRF protection, bcrypt for passwords, security headers configured on the Nginx config Nimbus generates for itself. None of it is optional.
UI polish matters more than I thought for sysadmin tools. The whole point of a panel is to make something easier. If the UI is confusing or ugly, people will just go back to the terminal. Material Design gave me a solid foundation, but getting the spacing, typography, and component interactions right took real effort.
Nimbus is currently at v1.0.6 (latest release: December 2024). The roadmap includes scheduled backups with cloud storage, FTP account management, two factor authentication, team/multi-user support, Docker integration, WordPress quick install, DNS management, and firewall rules.
The project is MIT licensed and open for contributions — if any of this sounds interesting, the repo is at github.com/sudhirrajai/Nimbus.
Building Nimbus scratched my own itch, but I hope it's useful to other developers who want real control over their servers without the overhead of enterprise panels or the friction of doing everything by hand. Sometimes the best tool is the one you build yourself.
Stack: Laravel 12 · Vue.js 3 · PHP 8.2 · Nginx · MariaDB · Vite · SCSS
--- ### Article: Stripe vs Braintree: integrating both in one Laravel app - **URL**: https://sudhirrajai.com/blog/stripe-vs-braintree-integrating-both-in-one-laravel-app - **Date**: 2026-05-15 - **Excerpt**: A pragmatic comparison after shipping payment flows on both — pricing, webhook ergonomics, and SDK quality. #### Article ContentAt some point in a client project, I ran into a requirement that seemed simple on the surface: "We want to support Stripe and PayPal." Easy enough, right? Stripe handles cards, PayPal covers users who don't want to hand over their card details. The catch was that PayPal's modern developer experience runs through Braintree — and Braintree also handles cards. So now I had two payment processors that overlapped in capability, needed to coexist in a single Laravel app, and had completely different integration philosophies.
This post is what I learned from building that integration.
Before writing a line of code, it's worth understanding what each processor actually is.
Stripe is API-first, developer-obsessed, and has arguably the best documentation in the payments industry. Everything is a resource — Customers, PaymentIntents, Subscriptions — and the API is predictable and consistent. Stripe.js and Stripe Elements handle the frontend, keeping card data off your server entirely.
Braintree is owned by PayPal and is the underlying infrastructure for PayPal's developer offering. It supports cards, PayPal, Venmo, Apple Pay, and Google Pay through a single integration. Its model is slightly different from Stripe's — it uses a client token flow where your server generates a token, your frontend uses it to collect payment info via the Drop-in UI or Hosted Fields, and then sends a payment method nonce back to your server to complete the charge.
The key difference philosophically: Stripe gives you granular API control. Braintree gives you a broader payment method umbrella with a slightly higher abstraction layer.
The temptation is to treat these as two separate, parallel implementations — duplicate your checkout logic for each processor and branch on which one the user picks. That gets messy fast.
Instead, I built a payment abstraction layer: a PaymentGateway interface that both processors implement, with a factory that resolves the right one at runtime. Your application code never talks to Stripe or Braintree directly — it talks to the interface.
php
interface PaymentGateway
{
    public function charge(int $amountInCents, string $paymentMethodToken, array $metadata = []): PaymentResult;
    public function createCustomer(User $user): string;
    public function attachPaymentMethod(string $customerId, string $token): void;
    public function refund(string $transactionId, ?int $amountInCents = null): bool;
}
PaymentResult is a simple DTO that normalises the response from either processor into a consistent shape — transaction ID, status, amount, processor name. This means your order creation logic, receipts, and webhook handling all work the same regardless of which gateway processed the payment.
Install the official PHP SDK:
bash
composer require stripe/stripe-phpStripe's integration in Laravel is straightforward. For one-time charges, the modern approach uses Payment Intents — a two-step flow where you create the intent server-side and confirm it client-side, which properly handles 3D Secure authentication.
php
// StripeGateway.php
class StripeGateway implements PaymentGateway
{
    public function __construct()
    {
        Stripe::setApiKey(config('services.stripe.secret'));
    }

    public function charge(int $amountInCents, string $paymentMethodToken, array $metadata = []): PaymentResult
    {
        $intent = PaymentIntent::create([
            'amount'               => $amountInCents,
            'currency'             => 'usd',
            'payment_method'       => $paymentMethodToken,
            'confirm'              => true,
            'return_url'           => route('payment.complete'),
            'metadata'             => $metadata,
        ]);

        return new PaymentResult(
            transactionId: $intent->id,
            status: $intent->status,
            processor: 'stripe',
        );
    }
}
On the frontend, load Stripe.js, mount an Elements component into your form, and pass the client_secret from your server to stripe.confirmCardPayment(). Stripe handles the 3DS challenge flow automatically.
For config, add to config/services.php:
php
'stripe' => [
    'key'    => env('STRIPE_KEY'),
    'secret' => env('STRIPE_SECRET'),
    'webhook_secret' => env('STRIPE_WEBHOOK_SECRET'),
],Install the Braintree PHP SDK:
bash
composer require braintree/braintree_phpBraintree's flow has one extra step compared to Stripe — you generate a client token on your server, pass it to the frontend, and the Braintree Drop-in UI (or Hosted Fields) uses it to collect payment info and return a nonce.
php
// BraintreeGateway.php
class BraintreeGateway implements PaymentGateway
{
    private Gateway $gateway;

    public function __construct()
    {
        $this->gateway = new Gateway([
            'environment' => config('services.braintree.environment'),
            'merchantId'  => config('services.braintree.merchant_id'),
            'publicKey'   => config('services.braintree.public_key'),
            'privateKey'  => config('services.braintree.private_key'),
        ]);
    }

    public function generateClientToken(?string $customerId = null): string
    {
        return $this->gateway->clientToken()->generate(
            $customerId ? ['customerId' => $customerId] : []
        );
    }

    public function charge(int $amountInCents, string $nonce, array $metadata = []): PaymentResult
    {
        $result = $this->gateway->transaction()->sale([
            'amount'             => number_format($amountInCents / 100, 2),
            'paymentMethodNonce' => $nonce,
            'options'            => ['submitForSettlement' => true],
        ]);

        if (!$result->success) {
            throw new PaymentFailedException($result->message);
        }

        return new PaymentResult(
            transactionId: $result->transaction->id,
            status: 'succeeded',
            processor: 'braintree',
        );
    }
}
The frontend uses the Braintree Drop-in UI, which renders PayPal, card fields, and any other enabled payment method automatically — no extra frontend work needed per method.
javascript
braintree.dropin.create({
  authorization: clientToken, // from your server
  container: '#dropin-container',
  paypal: { flow: 'checkout', amount: total, currency: 'USD' }
}, (err, instance) => {
  document.querySelector('#pay-button').addEventListener('click', () => {
    instance.requestPaymentMethod((err, payload) => {
      // send payload.nonce to your server
    });
  });
});With both implementations in place, the factory is what ties it together:
php
class PaymentGatewayFactory
{
    public static function make(string $processor): PaymentGateway
    {
        return match ($processor) {
            'stripe'     => app(StripeGateway::class),
            'braintree'  => app(BraintreeGateway::class),
            default      => throw new InvalidArgumentException("Unknown processor: {$processor}"),
        };
    }
}
In your checkout controller, you determine which processor to use based on the user's selection — Braintree if they chose PayPal, Stripe if they're paying by card through your own form, or however your UX dictates — and resolve the right gateway.
php
public function processPayment(Request $request)
{
    $gateway = PaymentGatewayFactory::make($request->processor);
    $result  = $gateway->charge(
        amountInCents: $request->amount,
        paymentMethodToken: $request->payment_token,
        metadata: ['order_id' => $request->order_id],
    );

    Order::find($request->order_id)->markAsPaid($result);
}Both processors send webhooks for async events — payment confirmations, disputes, refunds, subscription renewals. You'll want a separate endpoint for each.
For Stripe, verify the signature using the webhook secret:
php
$event = Webhook::constructEvent(
    $request->getContent(),
    $request->header('Stripe-Signature'),
    config('services.stripe.webhook_secret')
);
For Braintree, parse the notification using your gateway instance:
php
$notification = $this->gateway->webhookNotification()->parse(
    $request->bt_signature,
    $request->bt_payload
);
Route both to a shared event handler that works off your normalised PaymentResult model — so a payment.succeeded event looks the same whether it came from Stripe or Braintree.
Amount format. Stripe works in the smallest currency unit (cents, so $10.00 = 1000). Braintree works in decimal strings ("10.00"). The abstraction layer is a good place to handle this conversion so it never leaks into your business logic.
Customer model. Stripe Customers and Braintree Customers are separate entities. If you're storing payment methods for repeat purchases, you'll need to store both IDs against your user record and use the right one per processor.
Refunds. Stripe refunds a PaymentIntent or Charge. Braintree voids or refunds a Transaction. The method signature is the same in your interface, but the underlying call differs.
Testing. Stripe has a rich set of test card numbers and a test mode dashboard. Braintree has a sandbox environment. Both are solid — just keep your .env values and webhook endpoints properly separated between environments.
For a small project with one payment method and no plans to switch? Maybe not. But the moment you're supporting two processors, or you might swap one out later, the interface pattern pays for itself. Your order logic, your receipts, your refund flows — none of them need to know or care which processor ran the charge. You can add a third gateway (say, Paddle for SaaS billing) without touching any of that code.
Payments are one of those areas where a little upfront architecture saves a lot of pain later. The abstraction layer adds maybe two hours of work. Untangling tightly-coupled processor logic six months down the line costs a lot more.
Stack: Laravel 12 · Stripe PHP SDK · Braintree PHP SDK · Stripe.js · Braintree Drop-in UI